Kindle Fire 7" 5th gen tablet is kind of awesome.
I have to say the Kindle Fire 7" (5th generation) tablet is kind of awesome once you scrub all of the ads and Amazon itself out of it! Don't get me wrong the Amazon store for Android apps is always an impressive thing to have on your unit but when those very apps start bombarding you with ads for non-prime customers is the line that gets drawn in the sand for me. At the time of this posting this tablet is for $39 which for a quad-core 7" tablet is not bad at all. Of course, with ad revenue governing over the unit, it makes sense for Amazon to literally sell you a unit like this at wholesale not expecting guys like me to come along, completely disable the ads, and better yet, eject the OS and replace it with CyanogenMod 12.1 because why the hell not!
I should note that this is just a blog entry about my experiences with the unit. I'm not going to make a guide about how to hack it as I feel there are guys out there who are generations better at explaining this than myself. I shall post links and whatever additional notes I find out about this unit during the week of my playing around with it.
"Note: If you get a black screen but the audio is playing. Or you got a potato PC and it's studdering. We have fallback Links below."
Video tutorial fallback mirrors:
In case you have no-script enabled or for some reason cannot see the title video on this website. We have provided direct links for these videos. For more information about the standards we use on this site click here if you would like to know more.
AV1       - Link
MP4/.h264 - Link
OGV       - Link
Our Kindle Fire.
We picked up this unit from Best Buy for a special promotion of only $39 bucks. The ones at best buy came in blue however if you want a different color you can visit Amazon and order one from there. It also came with a USB cable and 1amp 5vdc power supply. Wireless works on it even though it's a standard wireless G and does not do any of the 5.0ghz range (Let's remind everyone the price of this thing and suddenly 5.0 GHz is not that big of a deal!) . Bluetooth works as we were cable to connect the Ouya controller to this unit with some alterations (which will be explained later in this article). There's a microphone on here but beyond shouting at the Google voice system to all of the things you're never supposed to search for online I'm not entirely sure how good the quality of the microphone is. I'll have to make a recording in the future. Finally, there's a 7" LCD screen rated at 1024x600. The camera is about as good as you can expect out of a cheap tablet computer. 2MP rear with a VGA front camera. It pixelates heavily in darkness but operates very smoothly during the daytime. It even has a front camera that does a horrid resolution for those who love their Skype conversations.
Dead pixel action.
It should be noted that out of the four Kindles picked up at best buy for testing and also to give to random people to get their impressions that two out of those four ended up having a few dead pixels on the screen. If this were a $100 tablet there might be some annoyance but for those who are looking at this then the moment you receive your tablet immediately after you buy it (like, in the parking lot) open it up and power it on, most Kindle Fires are half charged because lipo batteries last the longest when in a half-charged state. If you get dead or white pixels of 3 or more you can take it back and get an exchange until you find one with a working screen.
The other Kindle Fires.
Well, you have the Kindle Fire 6HD which comes with a physically smaller screen but also a higher resolution screen which seems counterproductive. Also a faster processor and better audio processing for almost double the price of the stock kindle fire. Which isn't a bargain. There's also the Fire tablet 10" which at that level you minus will buy something like a Samsung for a little more money and be done with it.
Actually rooting the Kindle Fire and disabling the ads.
There are two sites you may want to check out is a library of scripts compiled together called "Amazon .. The XDA thread discusses this and here to download the file off of rootjunky's website. RootJunky has spent a lot of time with his videos on YouTube as well as the files he gives out for me to really re-invent the wheel on this one and I am perfectly cool with that. The file that you'll want to get is known is "Amazon-Fire-5th-Gen-SuperTool-old.zip" which is a collection of scripts that automate the ADB driver installation, setup Superuser access on your Amazon file, and load some other essential files for those who want to wipe out the unit and replace the OS with CyanogenMod. Another application of which the RootJunky script has an older version of is FlashFire which at the time of this posting the script contains version 3.0 which would lock upon loading Cyanogen or Open Google Apps. Version 3.2 is the latest version you can get.
Navigating around Fire OS.
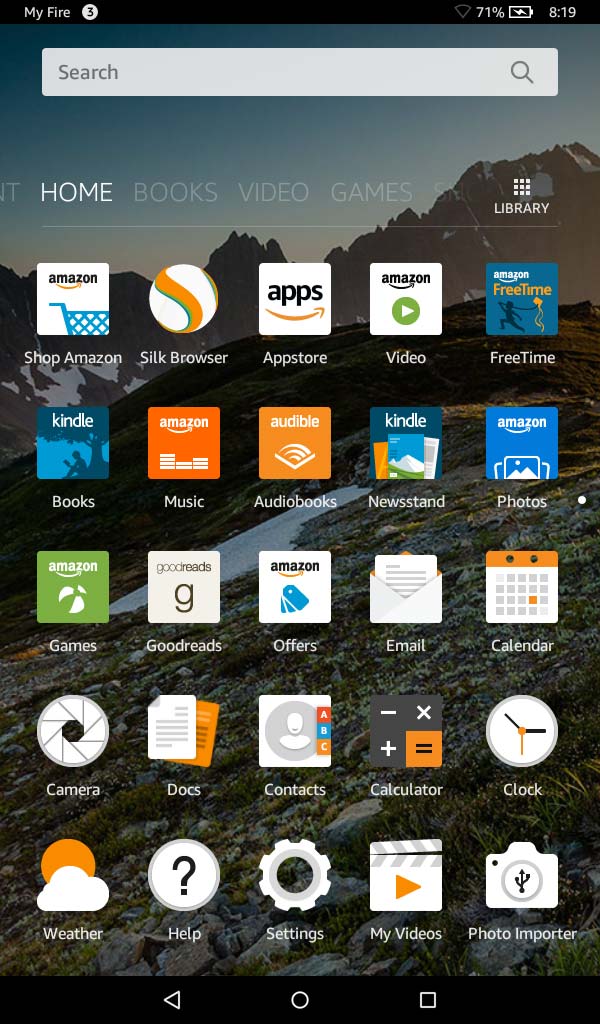 Before we even had to touch those scripts we had to prepare our newly booted FireOS for ADB and to find the version of the operating system that is installed. As a precaution be sure and skip over the setup of the wireless network. It will only get in the way with Amazon's attempt to update your tablet to a possible firmware version you may not be able to undo. If you click on the Setting icons on the lower gear-like icon on your screen we can make the desired changes.
 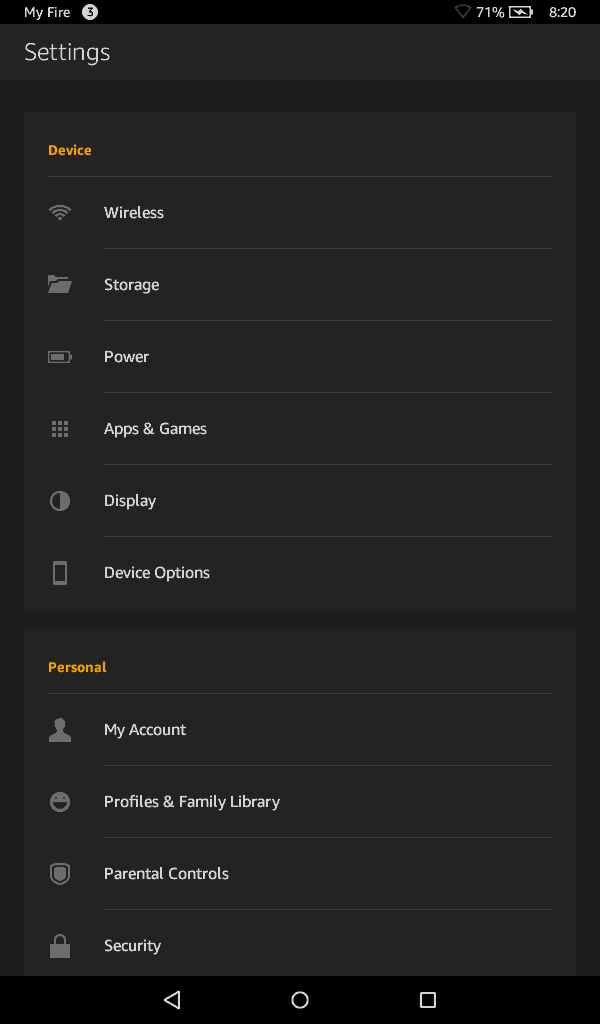 There are two things that we want to show you in the Device Options category.
 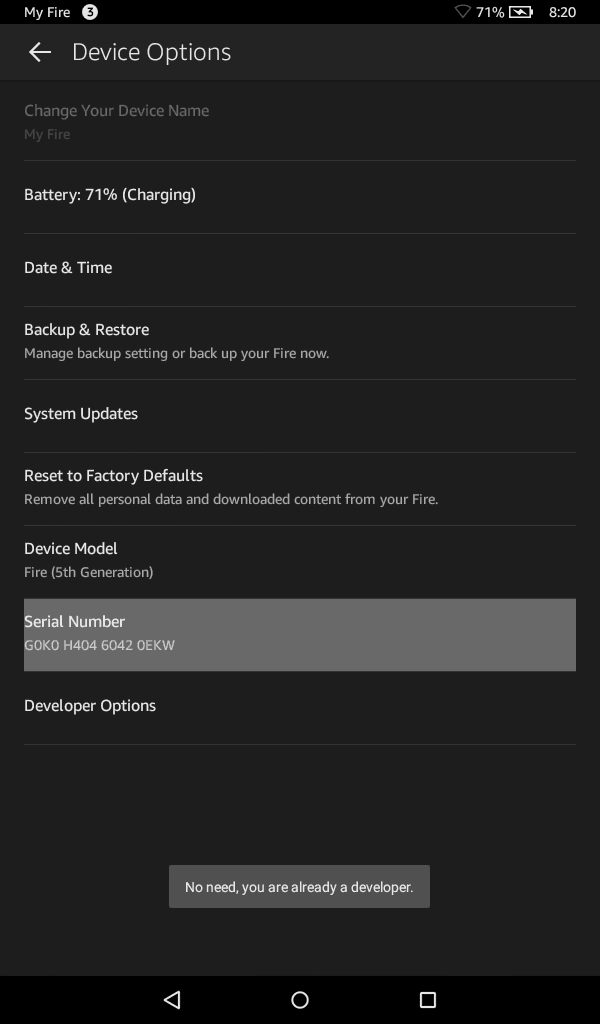 You're going to want to tap on that serial number category 5 times to unlock the Developer Options tab on the bottom. This is important to us to get access to some of the system mode settings for hooking it up to our PC.
  Tick the box to Enable ADB. Once this is done you should be able to hook up your Kindle to your PC and not only will it detect the MTP device capable of transferring files back and forth to this tablet but also direct shell access.. However, we have not rooted the Fire OS as of yet.
Version Checking:
Version checking may not be important but it could save you some headaches as to what direction you go with some of the drivers/utilities that you use.  Back out of developer options and go into system updates. This will be handy to know what version of Fire OS you are running.
 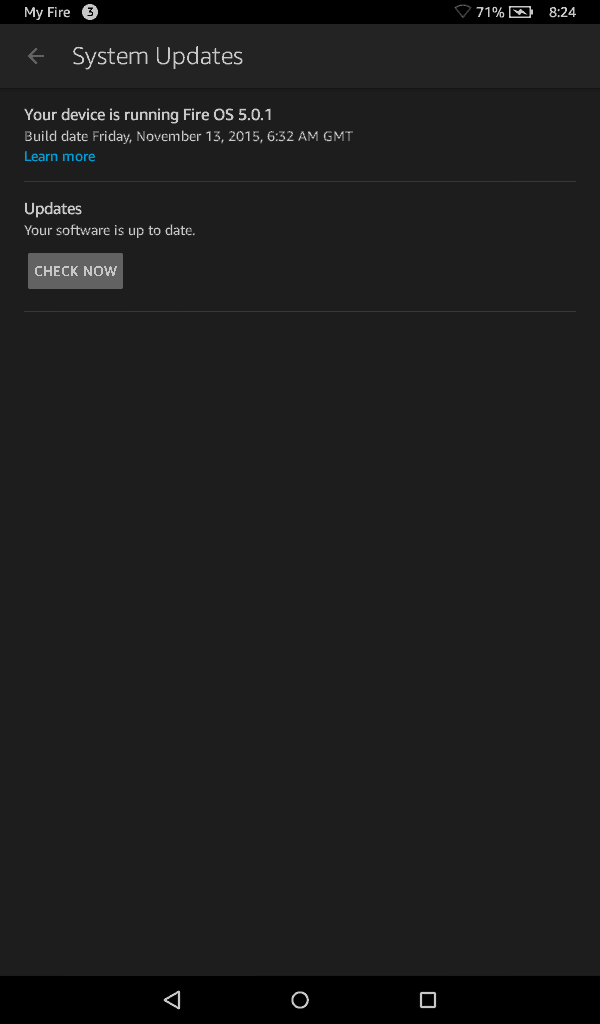 There is two different procedures for 5.0.1 and 5.1.1 however I ran the 5.1.1 hack on a Kindle Fire with only 5.0.1 and it still works. So I'm going to assume that the instructions for 5.0.1 are not depreciated as if you hook this Kindle up to the net it will download a newer OS for it.
 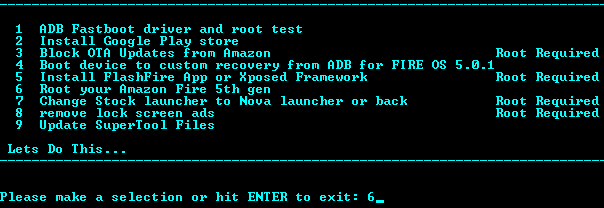 Before you do anything select option 9 to update SuperTool files. I learned this lesson the hard way and found that FlashFire-v30.apk was out of date and locked up every time I pushed something to my fire. Now that everything is set up we then went over to RootJunkys SuperTool. Since I already have my ADB drivers installed from messing around with Ouyas I just had to add the fire device to the profile and that's it. If you have not set up your ADB drivers then select option 1. I'm going for option 6 which is rooting my Fire.
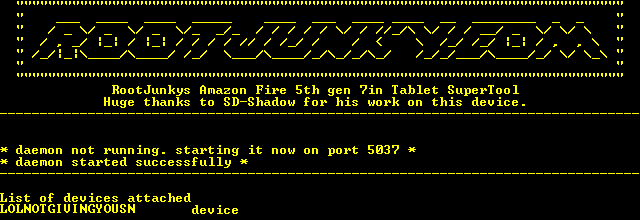 Serial numbers masked to protect the guilty.
You'll know your ADB driver is operating if it shows your Kindle Fire's serial number and the word "device" next to it. If it does not or shows nothing after "List of devices attached" , check your cabling and drivers.  Three of my Kindle Fires were 5.1.1. One of them was 5.0.1. I tried using the 5.0.1 Root and it didn't upload the SuperUser tool despite saying it installed correctly in the TWRP bootloader. I installed 5.1.1. onto a 5.0.1 Kindle Fire and it worked perfectly. So I'm just going to assume that 5.0.1 script it no longer required.
 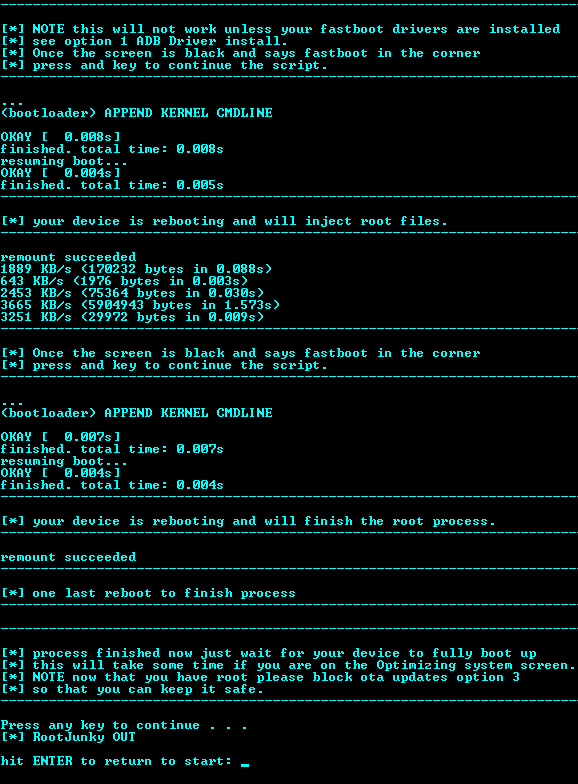 It is probably a very good idea to keep your windows Device Manager open during the root process as it will be bouncing back and forth between fastboot and regular mode a few times as you could see from the script results that were run on my side. This process can take about 2-3 minutes to complete.
  Once it's all done and if you DO like the Amazon Fire OS, you could proceed with removing screen ads and block the OTA updates on Options 3 and 6. If you wish to Install CyanogenMod, proceed to Option 5. Note: If for some reason it only installs FlashFire-v0.30.apk you will need to upgrade to FlashFire-v0.32.apk . Or else CyanogenMod and Google Apps will lock during "Calculating Space" on your tablet.
CyanogenMod this Fire!
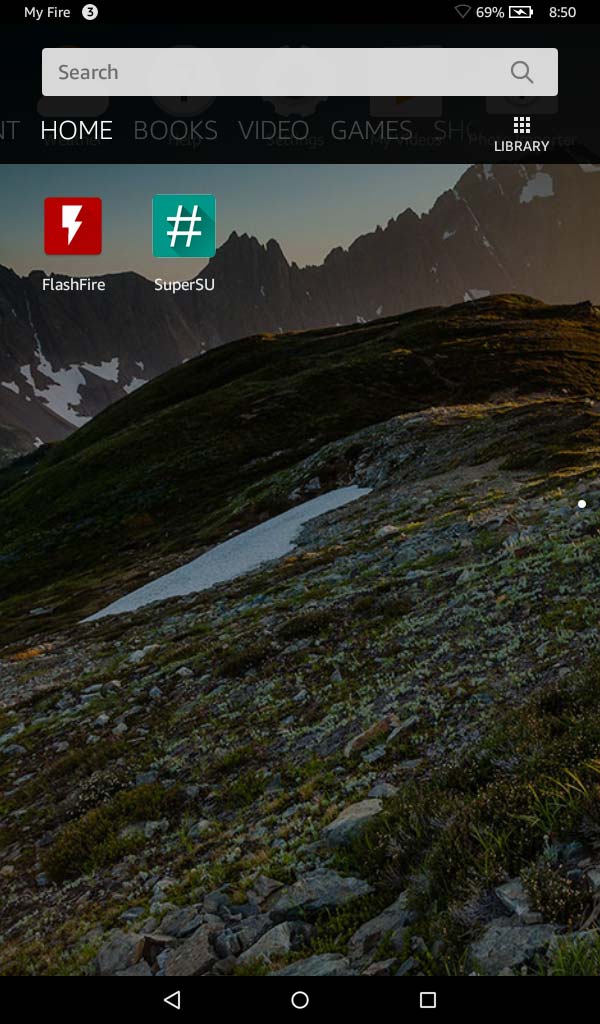 If everything installed correctly with the Supertool you should be able to swipe down on the applications menu and find FlashFire and SuperSU installed on your tablet. at this time you will want to pull the latest CyanogenMod file (Currently cm-12.1-20160420-UNOFFICIAL-ford.zip at the time of this posting) into your /storage/sdcard0/download folder. Now, if you still have your ADB cable hooked up to your PC you should be able to drag and drop it right from explorer. For those who know ADB you could go to dos and type
adb push C:\path\to\files\cm-12.1-20160420-UNOFFICIAL-ford.zip /storage/sdcard0/download
and you should be fine.
Google Apps (Optional)
 For those who are escaping the Tyranny of Amazon and instead wish to be underneath the Tyranny of Google, you could go to this site and download the latest Google Apps package. The fire is able to accept all of them except for the Super version due to memory constraints. Be sure and donate to keep this resource going as it helps out more than just fire! I choose the "Stock" release as I wanted my Fire to Connect to Google Play and go through everything for testing. I found out quickly that you can't customize what you want from Google Apps, that you have to take the breakdowns of packages as they explain here. Transfer the Google Apps package that you like to your /storage/sdcard0/download section of your Amazon Fire as well.
Continuing onward with FlashFire.
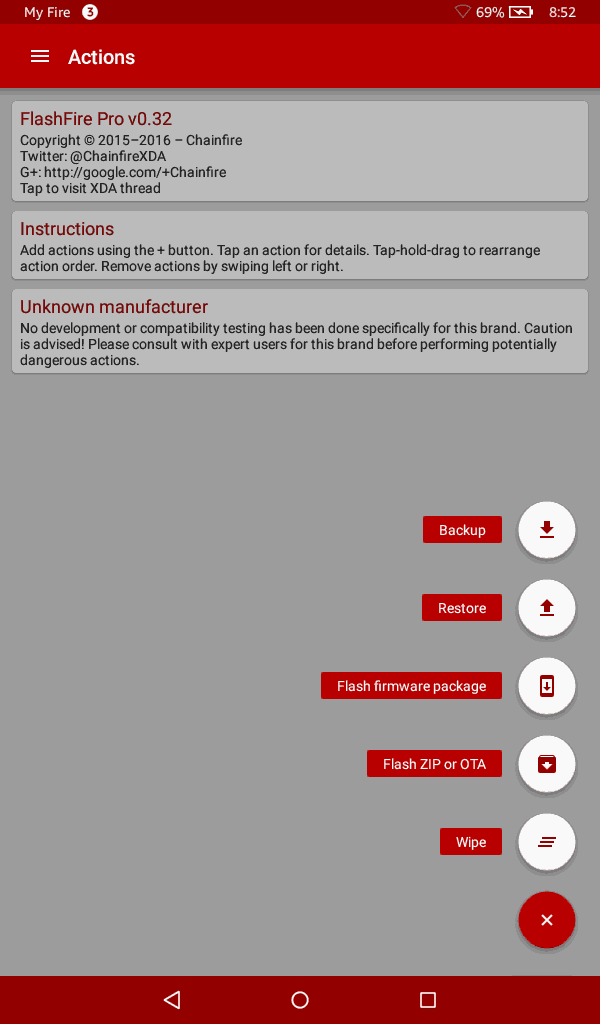 If you launch flashfire you should be greeted with the screen above. If you are instead greeted with a red exclamation mark stating that Root access cannot be acquired then you will have to go back into SuperTool and try to run the root process again.
 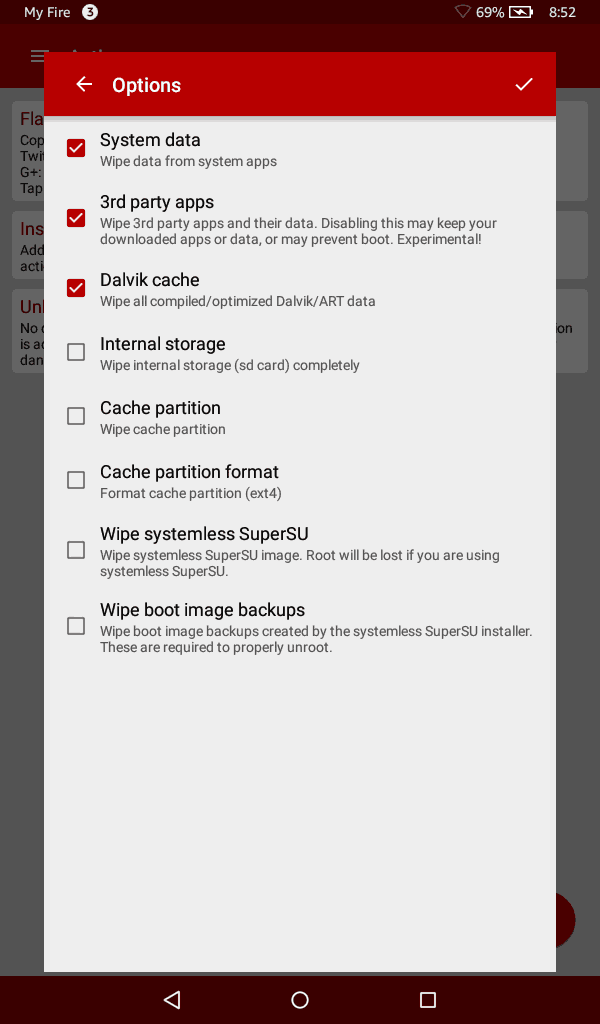 Select Wipe and make sure System data, 3rd party apps, and Dalvik cache are all checked or else Cyanogen will not load. Note: It is important that the Wipe command stays at the top of this process or else your flash will fail. you can hold-tap an option to drag it the top.
 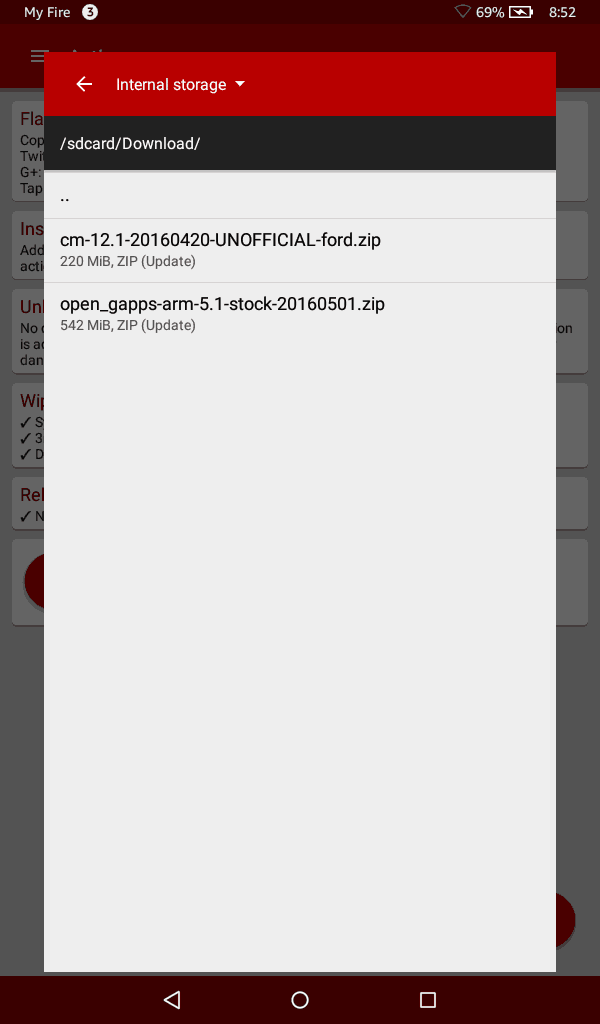 Next, we will select flash ZIP or OTA from the FlashFire main screen and select the CyanogenMod first. This is why it's important to transfer those two files over to your Kindle Fire.
  Ensure that nothing is checked during the CyanogenMod process of flashing. And tap the check mark in the corner to submit.
 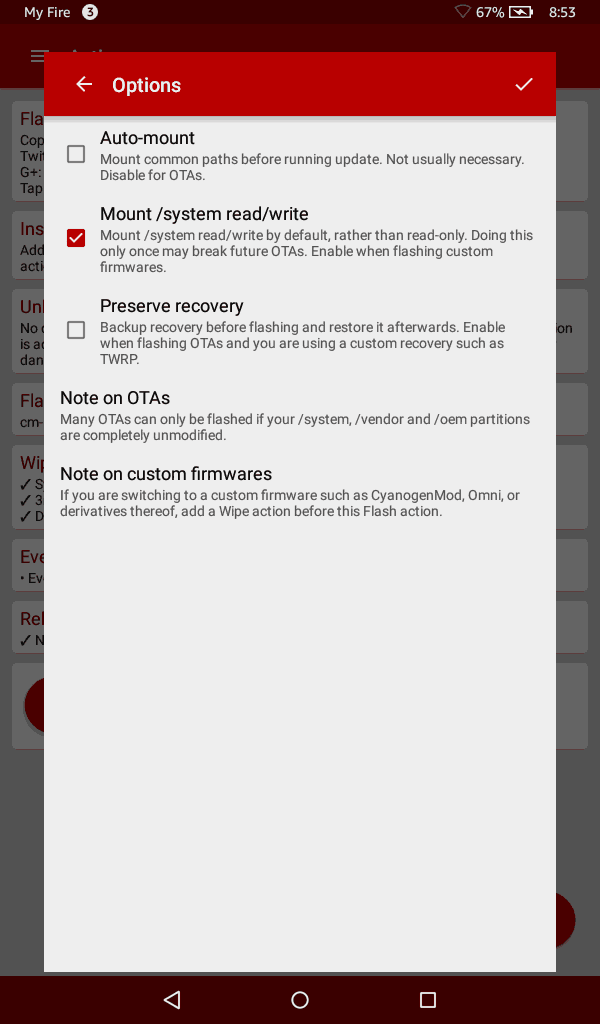 If you are installed Open Gapps onto your Kindle Fire. The options are default for adding this ZIP file and Mount/system read/write would be checked.
  If everything is inserted correctly your setting should look similar to the picture above. Now, remember to click-hold the Wipe setting and drag it up to the top of the commands we are about to pass. If everything looks good you can then press the FLASH command and wave Bu-Bye to Fire-OS. Now I don't have any pictures to show of the flashing process as there's no way to do a hardware capture of the OS flashing due to a lack of an HDMI port. And gorilla-level camera work is out of the question. So just to let you know that it should take about a minute to flash Cyanogen to your Amazon Fire tablet, and depending on what load of Gapps you selected (if any at all) it could take anywhere from 2-10 minutes to install all packages. The system would then restart and welcome you to Cyanogen then it will begin optimizing apps (once again anywhere from 2-10 minutes depending on how much was loaded).
 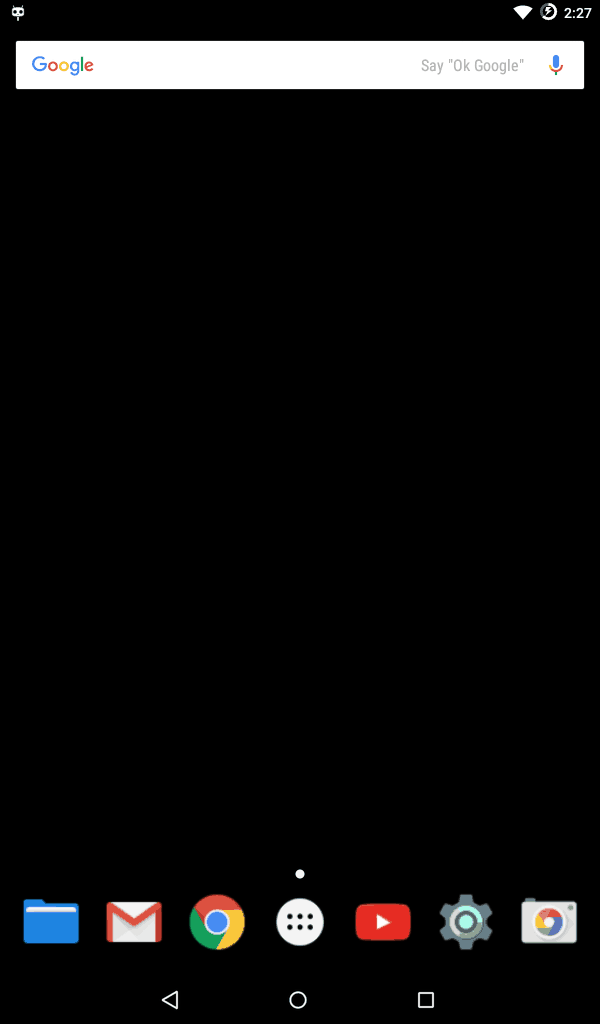 If everything went well you're Cyanogen Modded Fire with the equivalent of Android 5.1.1 or CM 12.1 is now completed.
Ouya Controller Action.
Because the fire has Bluetooth I was even able to get my Ouya Joystick working with it but I had to add Vendor_2836_Product_0001.kl to /system/usr/keylayout/ folder which of course requires you to remount the file system accordingly.
mount -o remount,rw /system
and then also modify line 41 of this.KL file from:
key 0x13f HOME ALT #Long Press
to:
key 0x13f MENU #Long Press
As this version of android does not use multiple key-presses and will fail the.KL defaults you to the shitty generic.kl file. Here's the log of what happens if you do not modify it.
E/KeyLayoutMap(  468): /system/usr/keylayout/Vendor_2836_Product_0001.kl:41: Expected key flag label, got 'ALT'.
I/EventHub(  468): New device: id=7, fd=156, path='/dev/input/event4', name='OUYA Game Controller', classes=0x80000141, configuration='', keyLayout='/system/usr/keylayout/Generic.kl', keyCharacterMap='/system/usr/keychars/Generic.kcm', builtinKeyboard=false, wakeMechanism=EPOLLWAKEUP, usingClockIoctl=true
Yeah, suck city. But if you modify lane 41 to use just one key then your Ouya Controller behaves perfectly fine.
 Download all the keymaps!
The amazon fire comes with almost no joystick keymap support! You can have a copy of my /system/user/key layout folder. I made a download link for you to grab them all. The original template is from my CyanogenMOD blog but if you want to try it out on your android go for it.
 Ouya anywhere even works on the Amazon Fire both the Fire OS with root access and CyanogenMod for those wondering.
Final thoughts.
I'm having a lot of fun with this Kindle Fire. For $39 bucks, its processing power is very good, and the display is nice. And in general, it's a hell of a bargain. Those who already have an Amazon Prime account may not want to switch to Cyanogen as Prime Members actually benefit a lot from the Fire OS. But I don't have Prime, thus, Cyanogen is better for me. I had to add a micro-SD card to my Kindle Fire as 2.8GB of free space just isn't going to cut it for all of the tests that I am doing on this thing. The dead pixel issue is highly annoying but easily taken care of with the local store that was selling them until I had several perfect Kindle Fires to distribute. We thank you for reading out the blog and hope you have a wonderful day.
Server protect you, don't die.
END OF LINE+++


This is a horror story. Since my Kindle Fire cost me $49, 10 years ago, I'm going to throw it away and buy something that's already "non-Amazon", or maybe even "non-Android".