The On-Screens Display (OSD) bug in Kodi Ouya CM11.
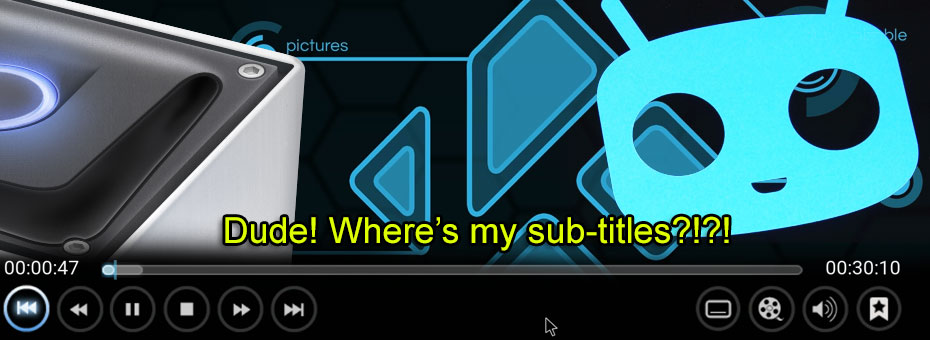
Before I talk about the On-Screen display issue there are a lot of people that visit my site that come from the Kodi website and that is totally cool! I love to see all of the people getting a little more life out of a console which was technically only supposed to last 1-2 years before the Ouya 2 was theoretically supposed to come out (and NO Razor, I'm not calling the Cortex the Ouya 2. Not happening.) Since a lot of people are upgrading their Ouya consoles to CyanogenMod 11 and by default Google Play takes over all of the upgrades of software including Kodi. Jarvis is now in a final alpha stage which means it is now released on Google Play. As a result, a lot of Ouya people are being automatically upgraded from Kodi Isengard v15 to Kodi Jarvis v16. Suddenly there's an issue with the on-screen display! If you play an MP4 file hit the "U" blue button on your Ouya Controller or the "X" button on your Xbox Controller suddenly the video doesn't show you the on-screen controls. Also pressing the Ouya or Xbox yellow "Y" button does nothing either. It strangely does slow down the video and even frames may begin to skip at 1080p but that's about it really! To add insult to injury. If you are like me and you watch a lot of anime, you will also notice that your subtitles are totally gone as well! Upon hitting the "A" red button on your Ouya Controller or the "B" red button on your Xbox controller you can actually see your subtitle text for one or two frames before the video ends and it returns you to the Kodi main screen. 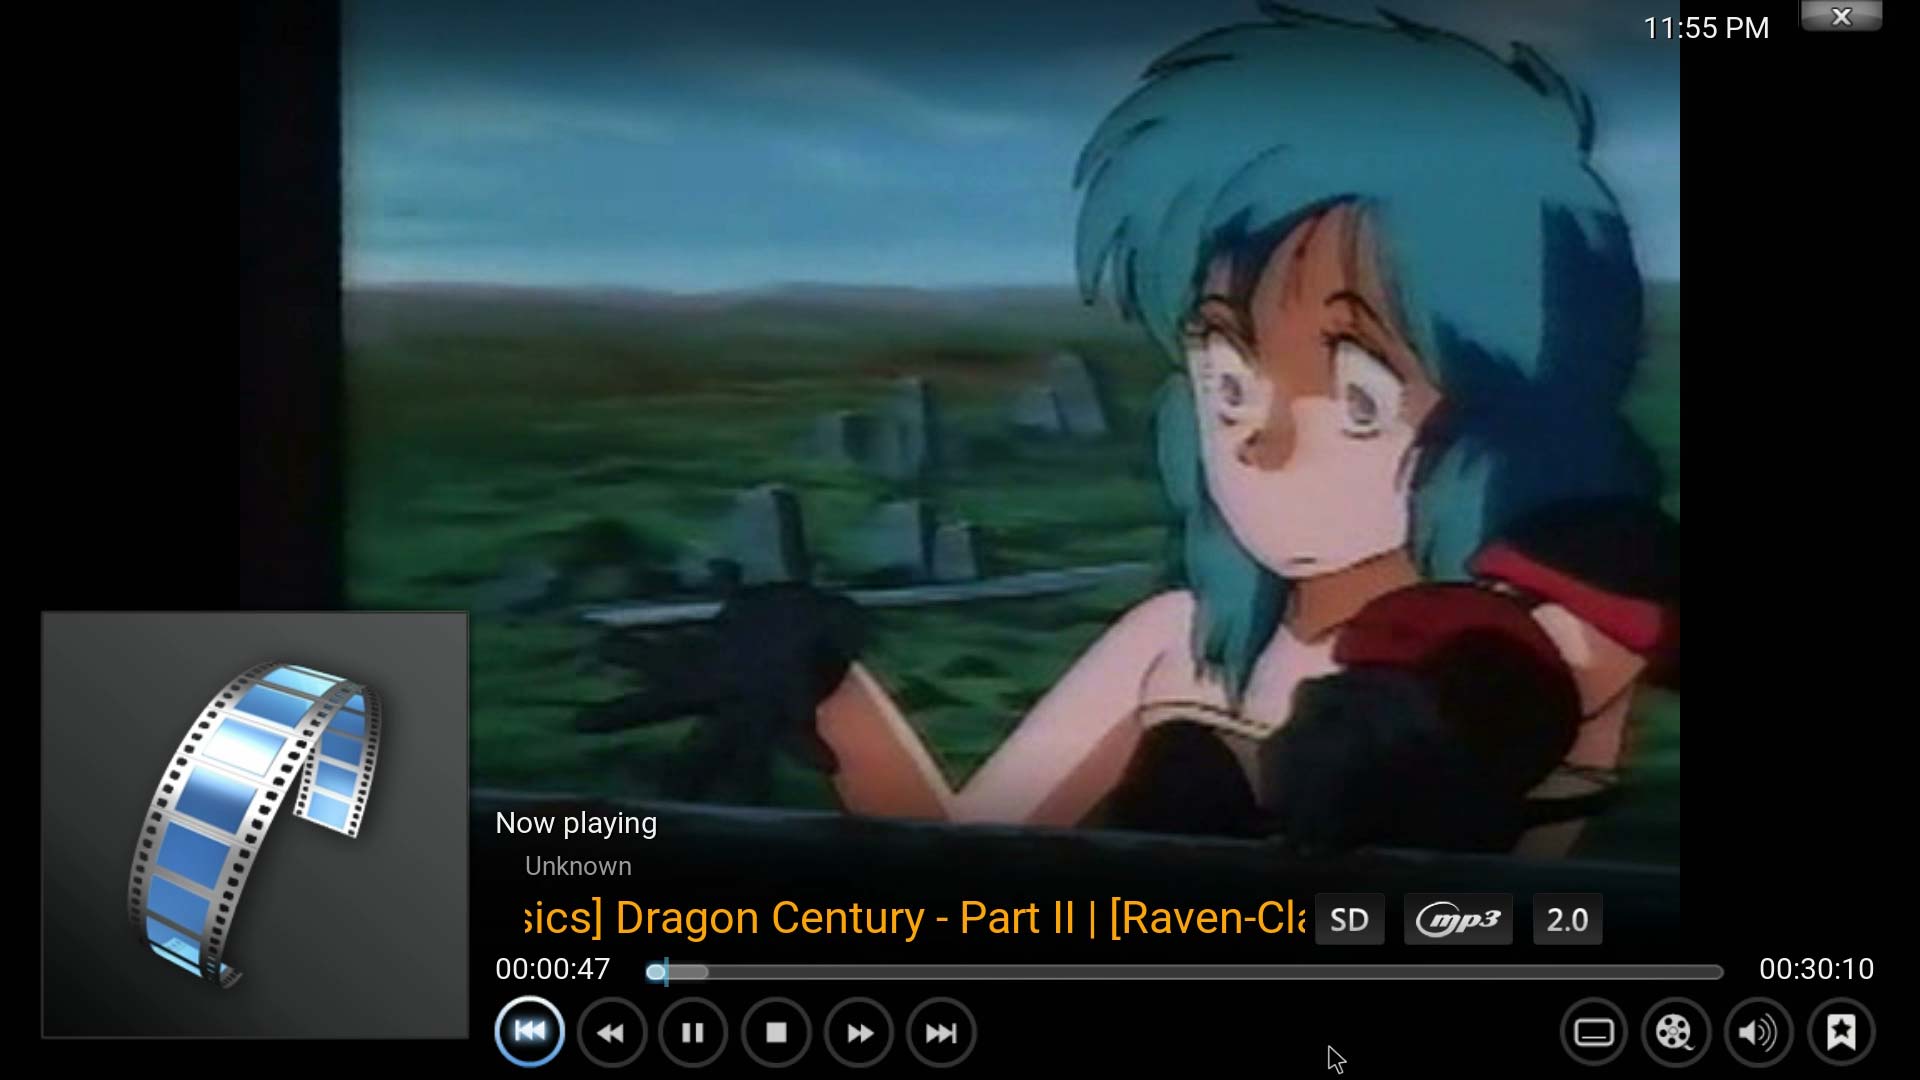 If you try this with an AVI file as I did with a really old anime I have the OSD pops up without an issue! If you respond something like this:
This is the problem I got with my Kodi! How do I fix it?
The answer is 2-d vs 3-d confusion. I'm no programmer so apologies for the laments descriptions I am about to give. Avi's in Kodi is played directly off of the CPU and thus are all 2-d objects. MP4s because they require more CPU power to decode especially 1080p video is being bounced off of the GPU combined with the CPU in an efficient manner of handling the video it makes a 3-d texture to place the video onto as it is playing on Ouya or Android device. For some reason on the Ouya running Cyanogen 11 the 3-d output overrides all of the 2D graphics of Kodi instead of laying on top of the screen as it should. I'm not sure if this is a bug in Cyanogen, or perhaps even a bug with how the Nvidia Tegra 3 chip is handling the code from Kodi. I'm not sure about this! But I do have a workaround for you guys:
Get into the developer options menu:
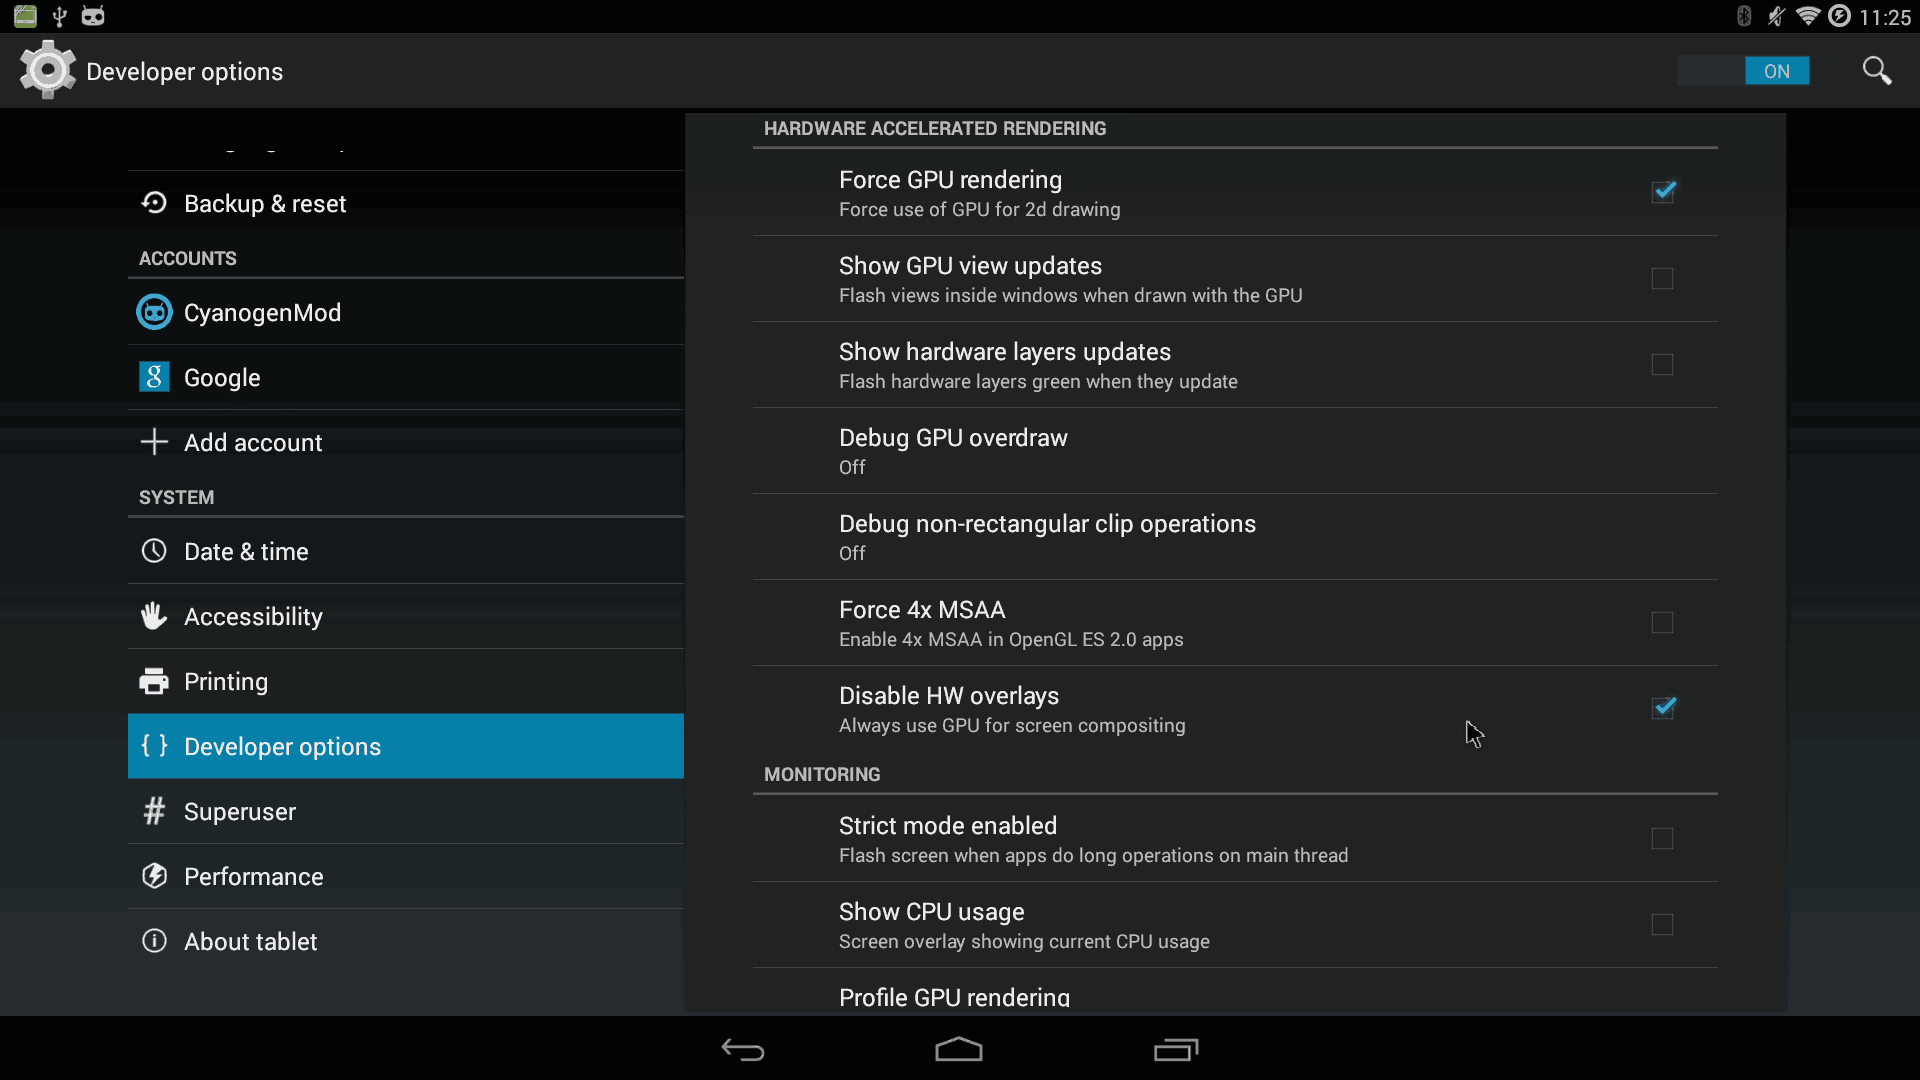 This may be a trivial step for a lot of Cyanogen users however unlike the stock load of Ouya running android JellyBean by default the developer options menu is hidden in Cyanogen. When you first load Cyanogen 11 onto your Ouya; Go into the "Settings" of your operating system. Then scroll all the way down to "About tablet" and click on that. Then on the right-hand side scroll down to "Build Number" and click on it 5 times! This will pop the Developer Options tab in the left-hand side of your settings permanently.
Disabling Hardware Overlays in Cyanogen / Android environment.
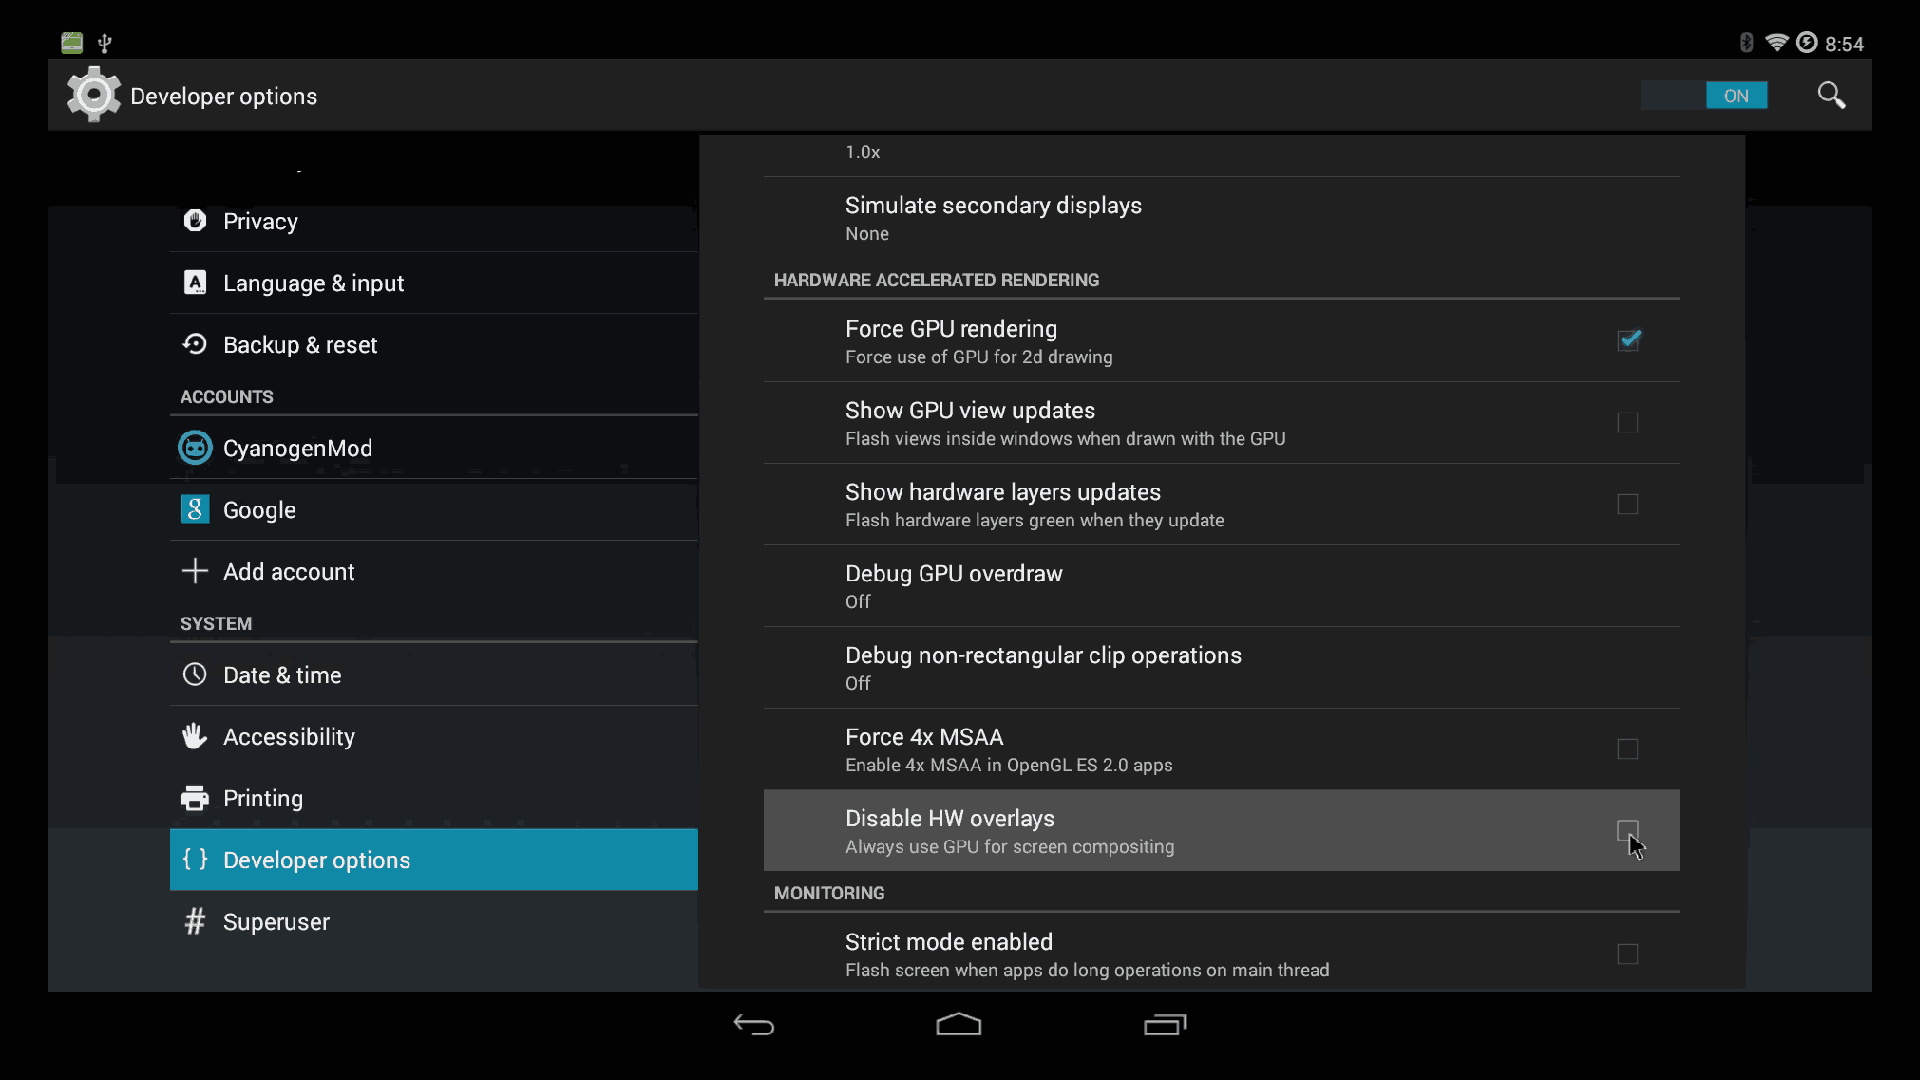 Now that we have access to Developer options you can go in there and on the right-hand panel scroll all the way down to the "Hardware Accelerated Rendering" section and check the box to "Disable HW Overlays" . What this will do is it will attempt to force EVERYTHING through the GPU instead of mixing 2-d with 3-d. As a side note checking this option may impact the performance of some of your Ouya or android games if you so happen to have any loaded inside of Cyanogen.
  Once complete you can exit out of settings and launch Kodi to see if disabling the overlay helped. On my three Ouya's it did correct the problem with Kodi Jarvis and a few users have also tried this as well.
But S, if you reboot your Cyanogen Ouya Disable HW Overlays turns back off again! I want to keep it off for good!
Update 3/20/16 - There are two ways you can do this. Via ClockWorkMod where you don't have to type in a thing. and the more traditional ADB route. I'm always trying to make this process easier.:)
Method 1: Install the patch via ClockWorkMOD Recovery Mode.
First, you will need to download the file KodiJarvis-HW-Patch-0.1.zip provided next to this paragraph. it is different than the download for Method 2 as it was created with the signapk.jar file. I tested this out by removing my script from my test Ouyas and seeing if CWM will re-add and set the permissions back onto them. So far everything passed! Place this file onto your Ouya via any file transfer means necessary to /sdcard.
Reboot into recovery mode.
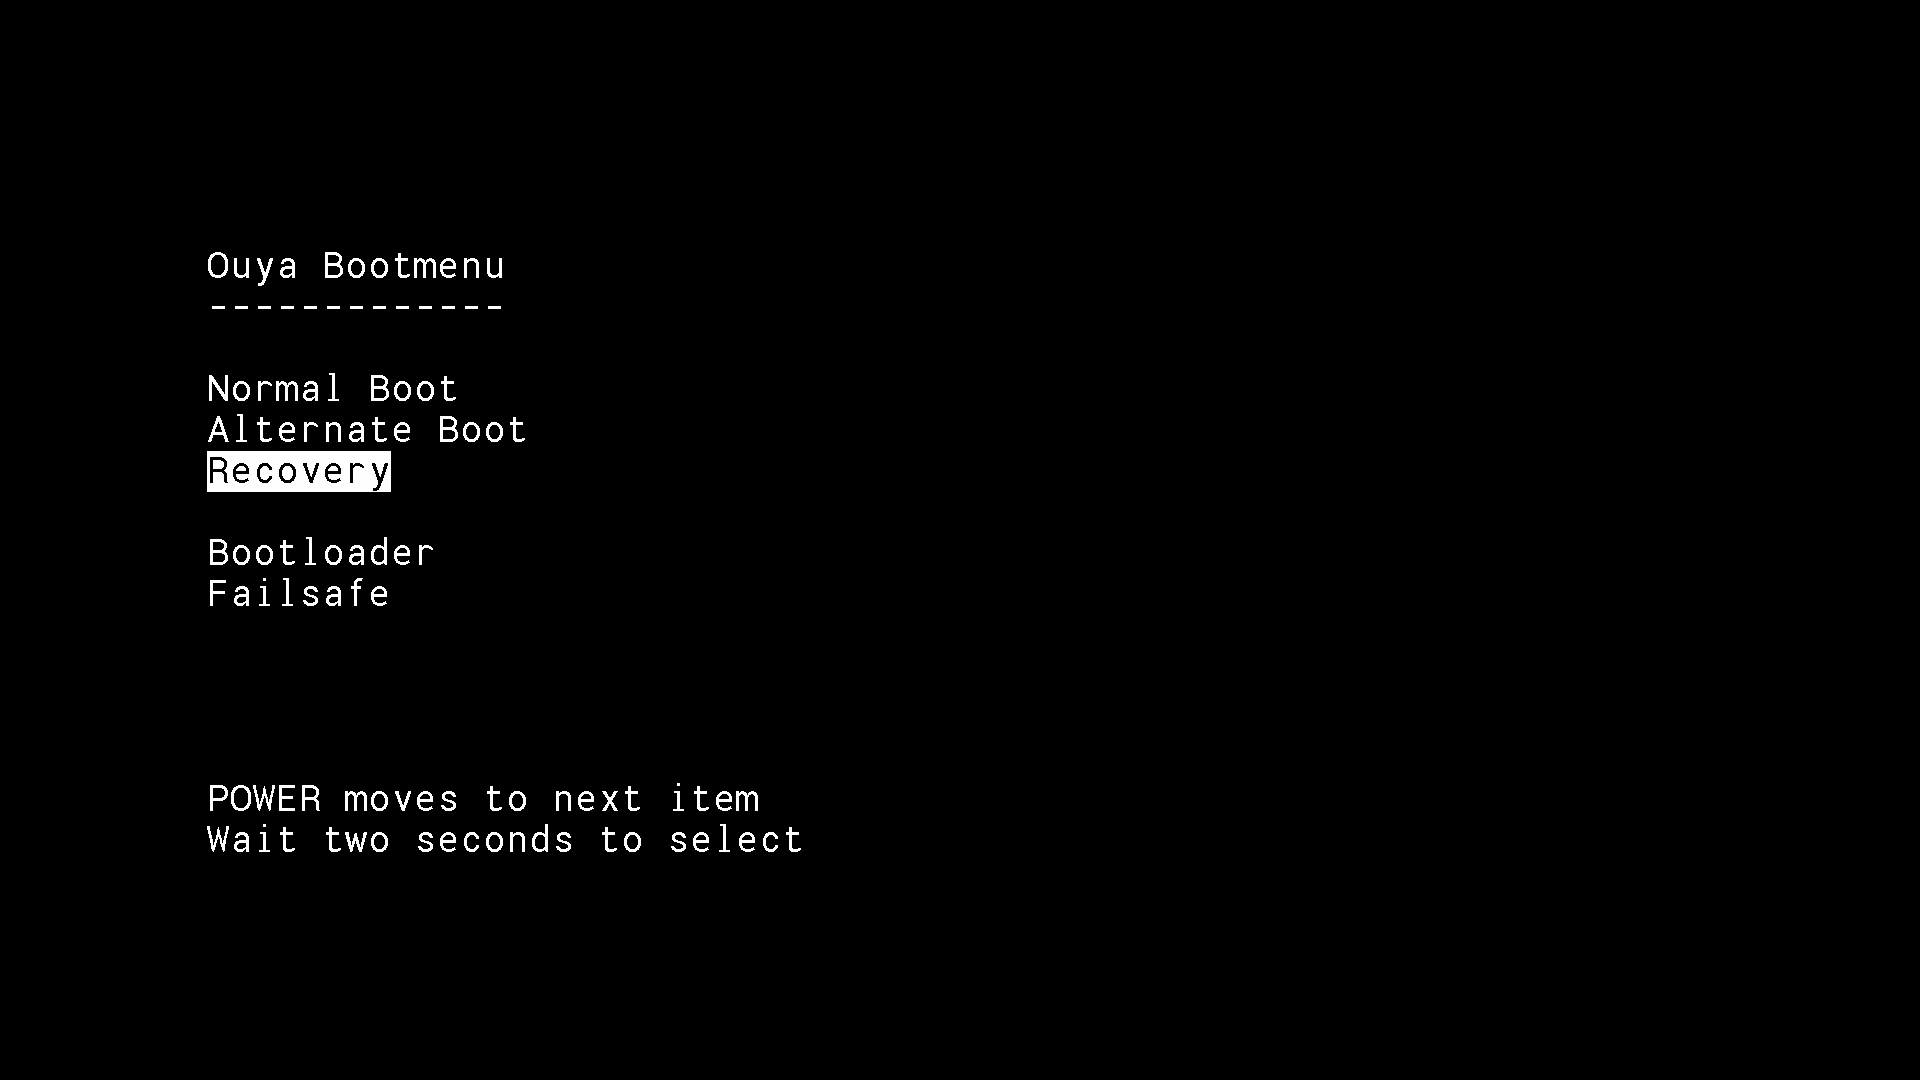 Reboot your CM11 Ouya and use the power button to select recovery mode. Alternatively, you can use a utility such as Quick Boot to do this or you can go into ADB and type "adb reboot recovery"
 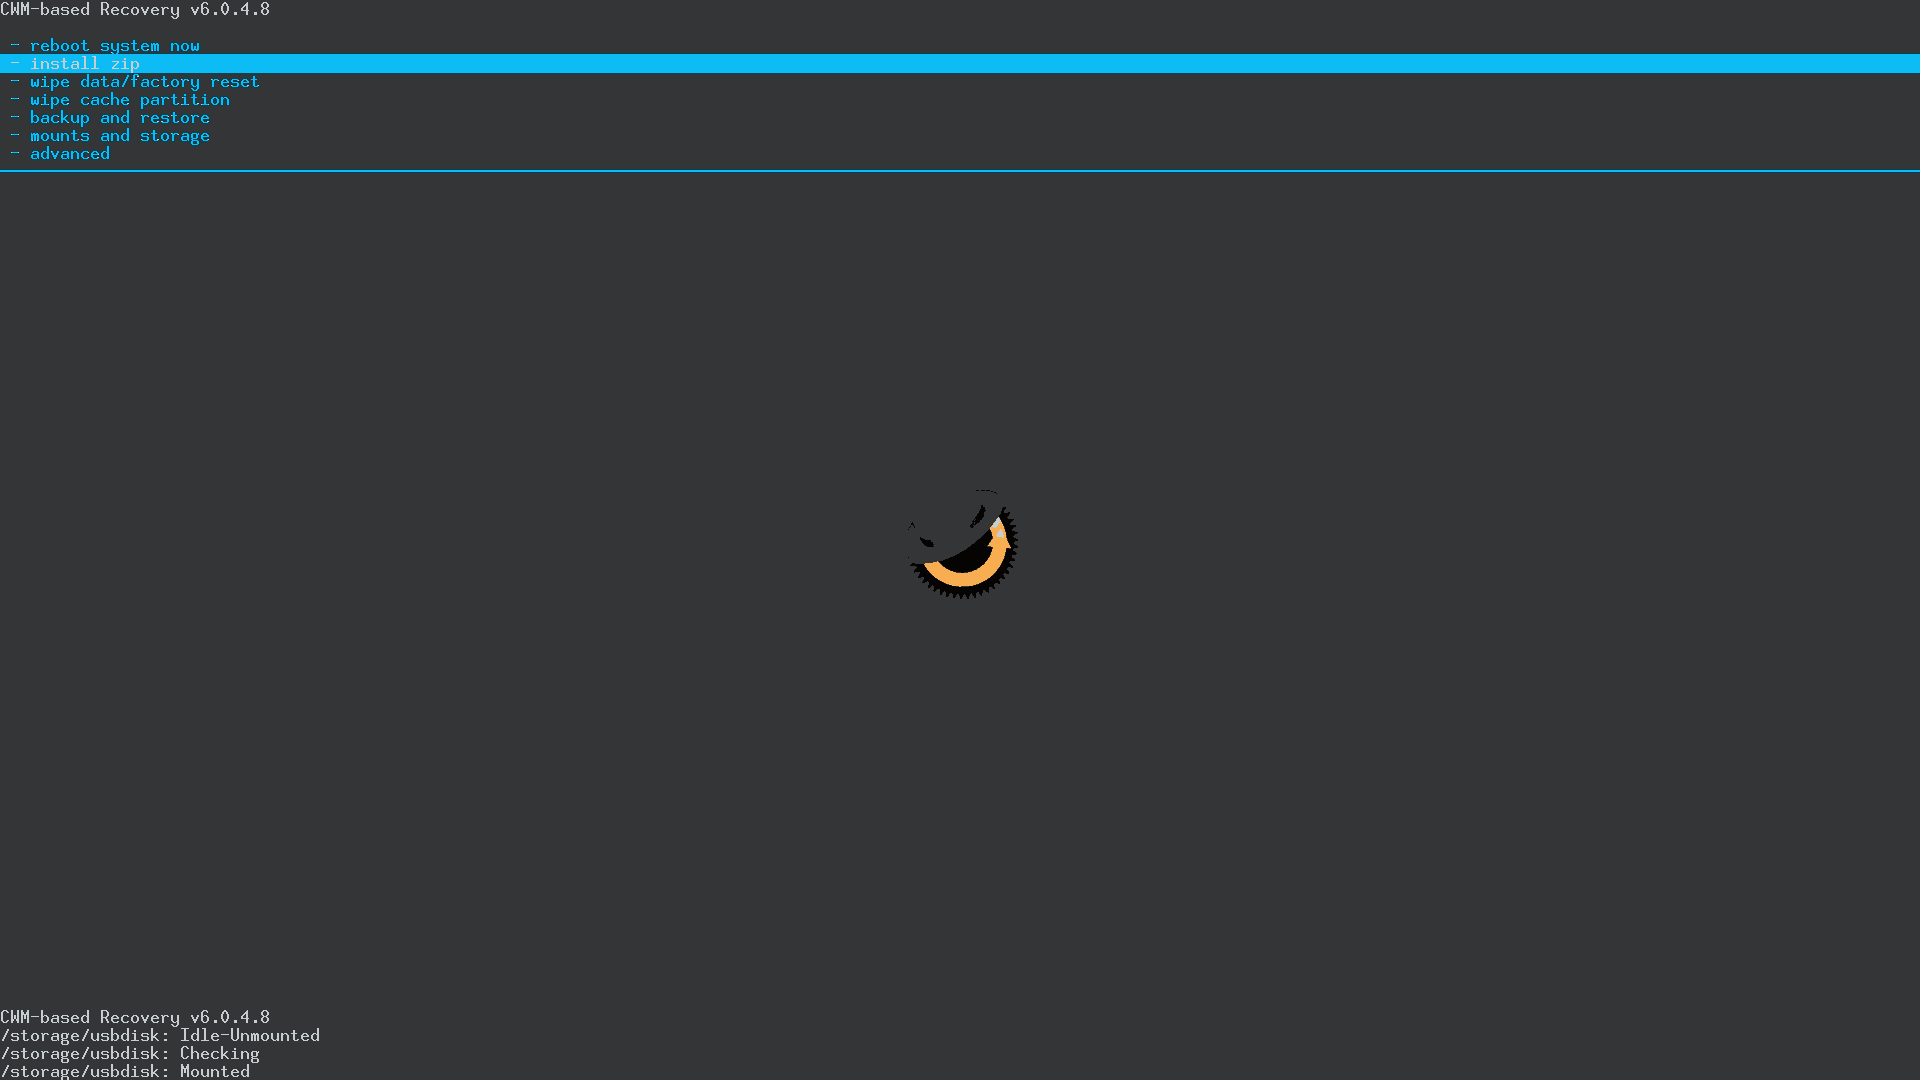 You will be greeted with a familiar CWM screen when you first performed your CyanogenMod. Using a keyboard, arrow down to "Install Zip" and press enter.
 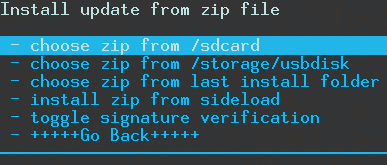 Select "Choose zip from /sdcard" and press enter.
 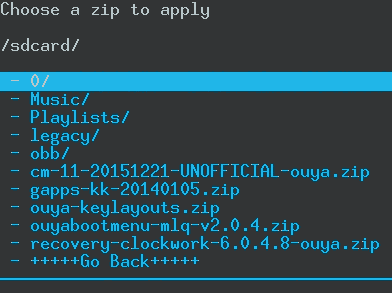 If you do not see the file you just downloaded for Kodi you may have to select the "0/" folder to go back since cyanogen makes its own profile folder in a different location.
 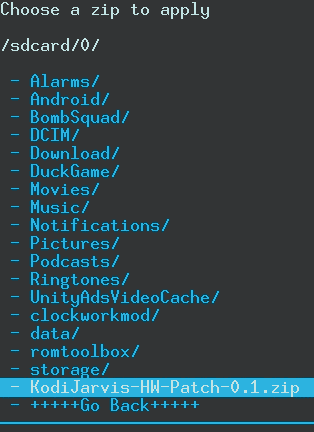 Select KodiJarvis-HW-Patch-0.1.zip and press enter.
  Select yes to continue installation of the patch to disable hardware overlay for Kodi Jarvis
  It will proceed with running the script that I cobbled together to install the 91overlay script file into /system/etc/init.d and chmod 755 the file to make it executable.
 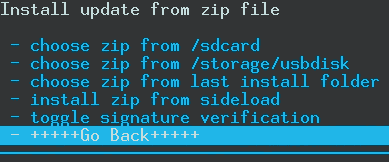 Once installed we can arrow down to "Go Back" and select enter.
 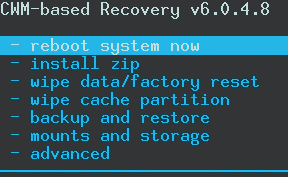 Finally, we can arrow over to "reboot system now" if you check your settings > developer options > disable hw overlay will now be checked permanently.
Method 2: Root access on ADB over CM11.
Okay, this involves a little bit of ADB magic and a script that you can download here. It was provided to me from the XDA developer forums by a user by the name of titanic_fanatic (be sure to pop over there and give him a thank you if it works out for you. I didn't make the script I only made this how-to document.). Either plug your ADB cable into your PC OR in the developer options and enable ADB over the network. For those who are paranoid of running strange scripts on your Android device, the only thing this script does is search for a service by the name of "SurfaceFlinger" which is responsible for hardware overlay and shut it down when the desktop gets initialized. That's it. If you have an Android OS tweaking utility you may not even need this script and can just shut down the service yourself.
Generating root access for ADB.
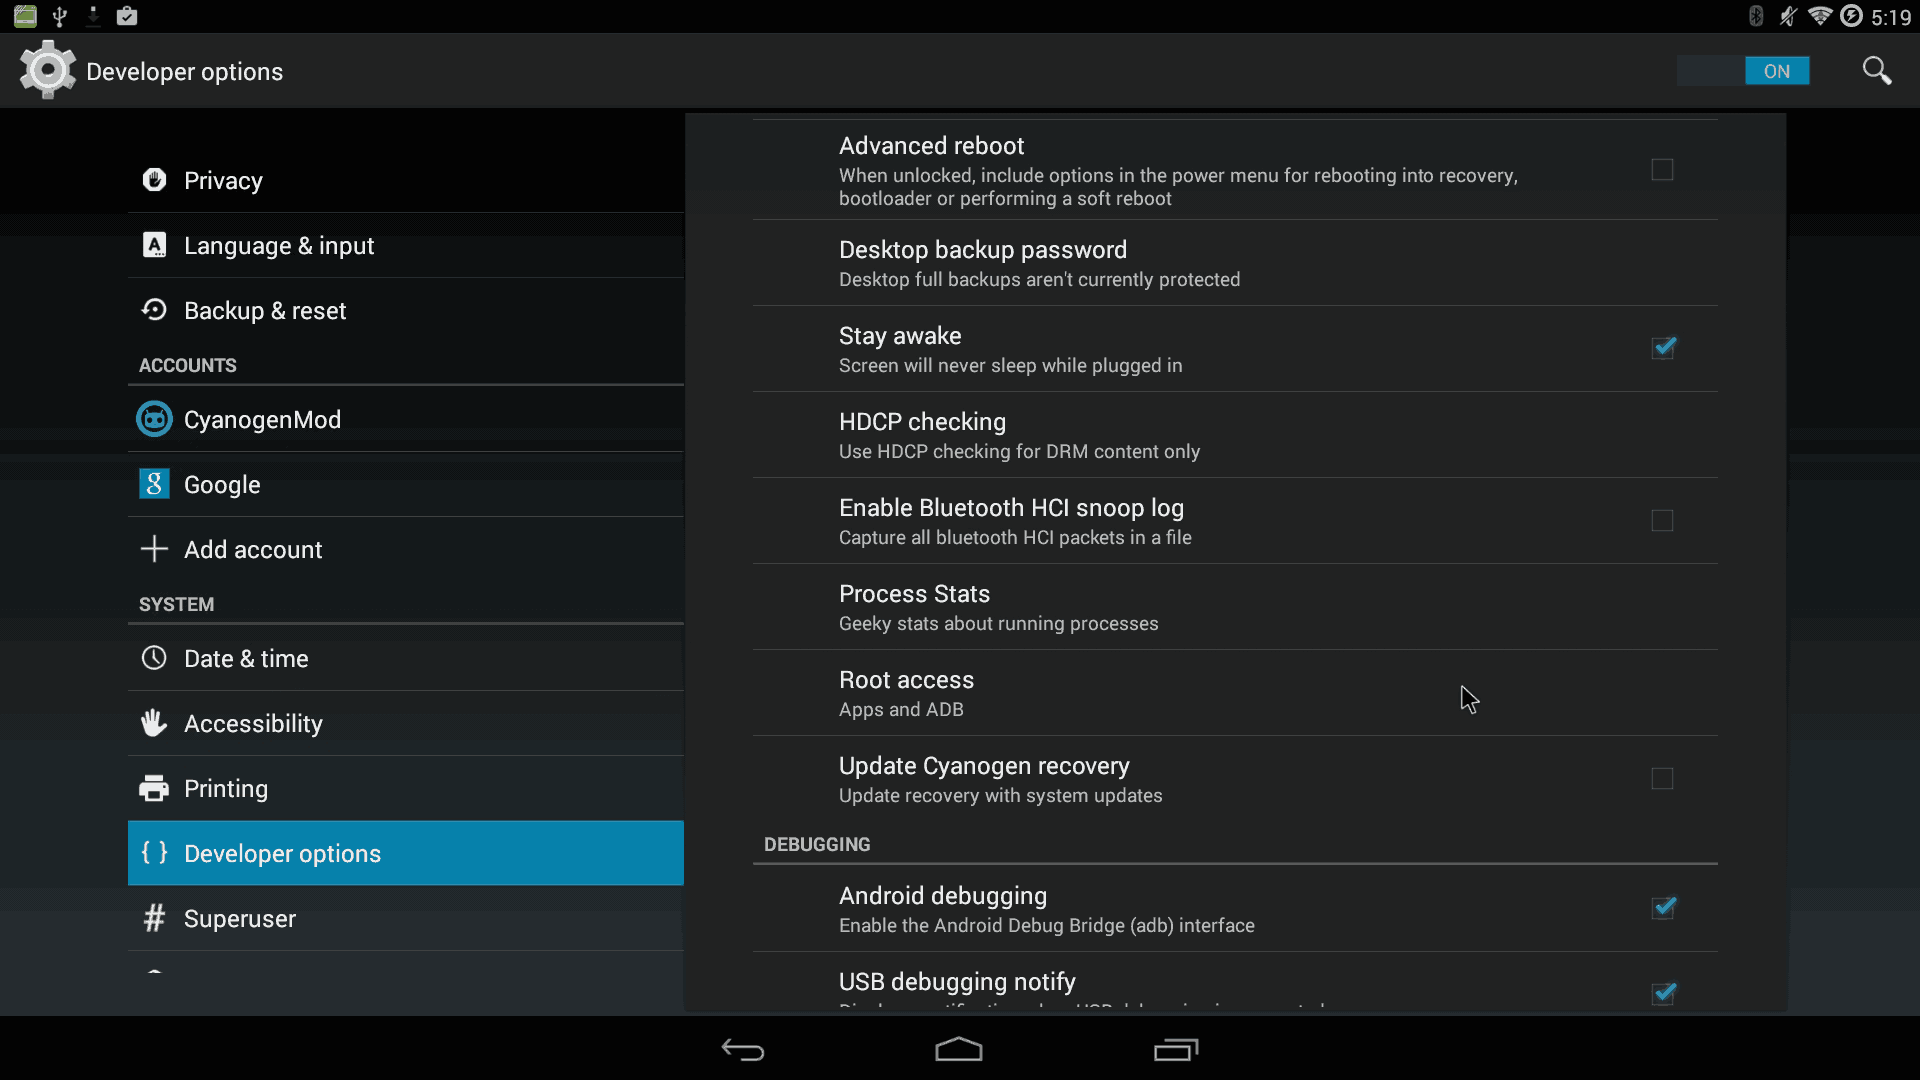 The first thing we want to do is go back into settings and developer options and click on "Root access." on a default Cyanogen load it will be set for "Apps Only." This will not do since we are going to be modding system files. Apps only allows us to pass commands like "ADB install" for APK installation and that's about it. The reason why this exists is it's another security measure to keep people from "The Net" from hacking your android box.
 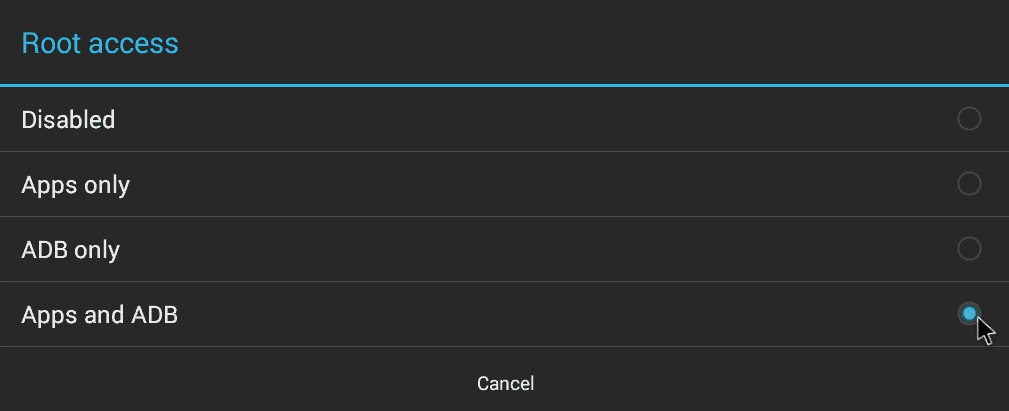 Change the setting from "Apps only" to "Apps and ADB". If you do not change this setting prior to accessing your CM11 Ouya via ADB the 'su' or superuser command simply will not work.
ADB connection over the network.
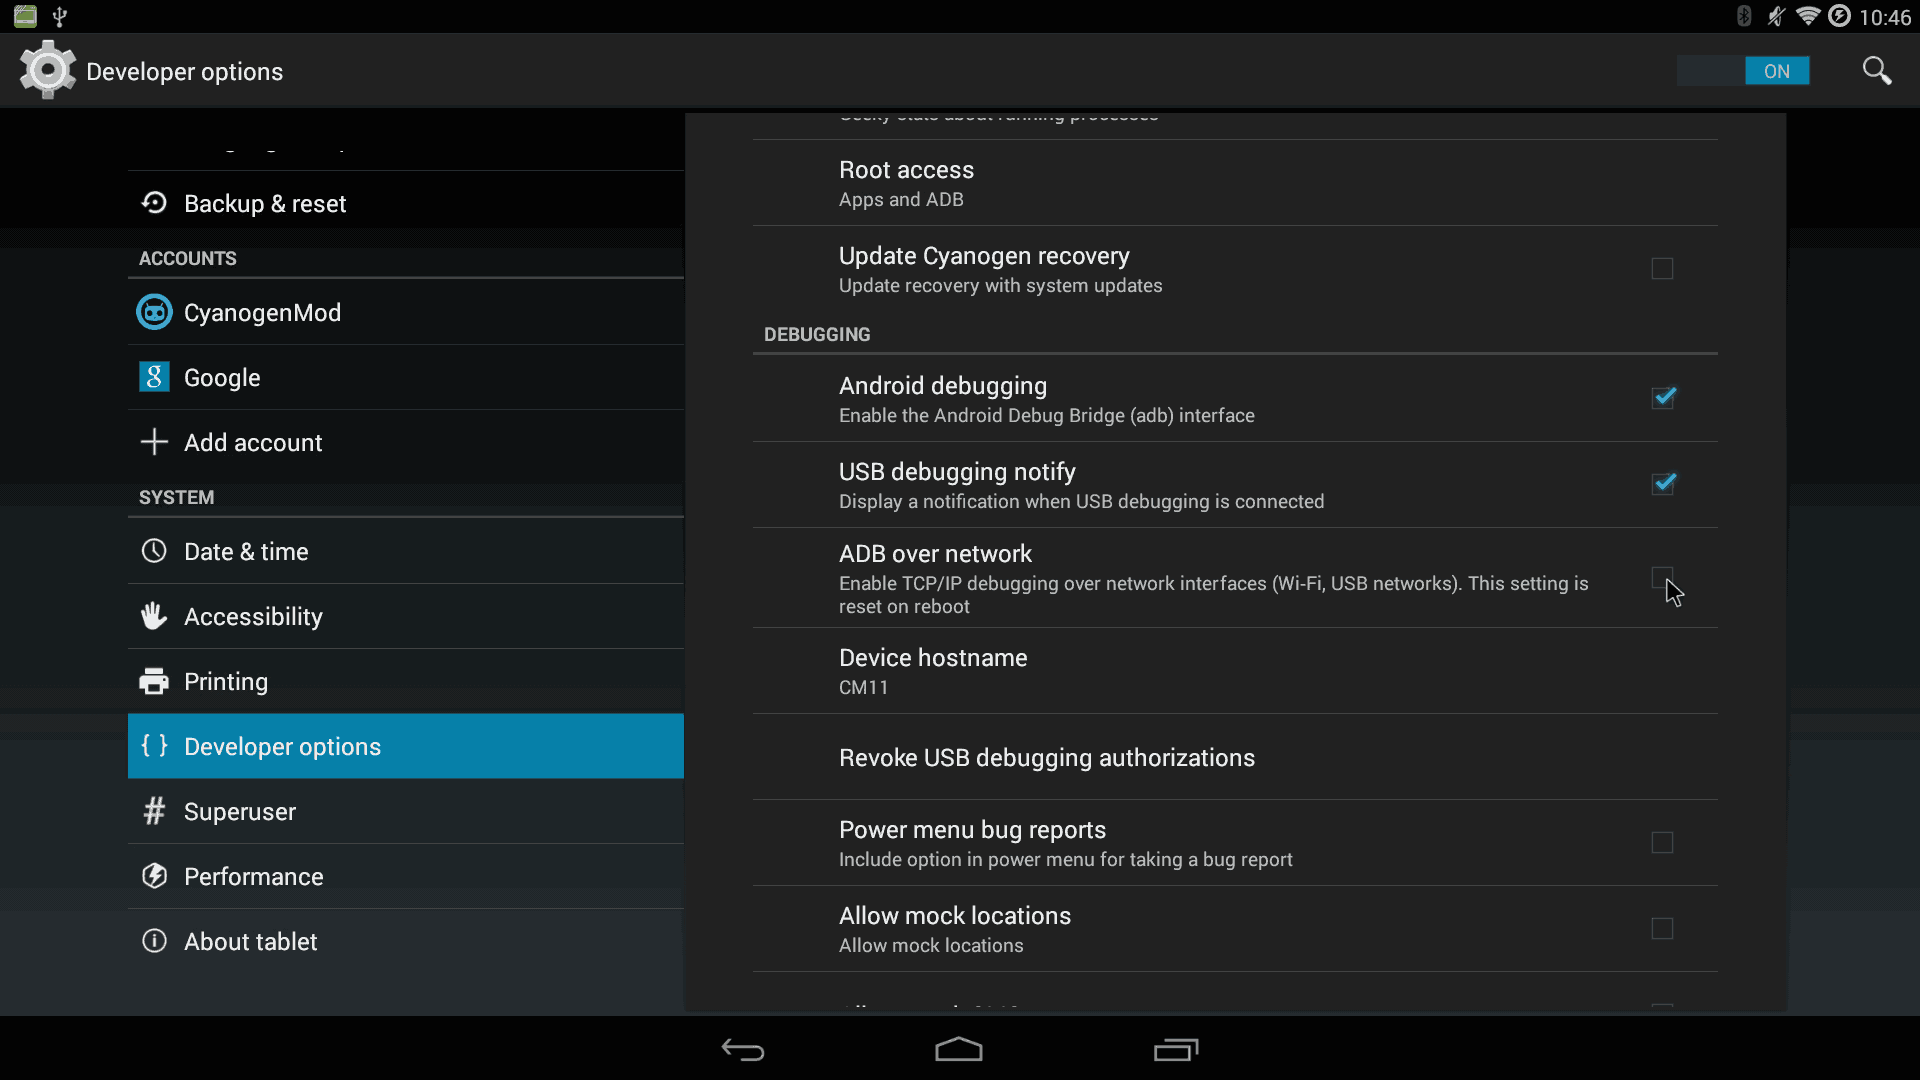 For those with their Ouya far far away from their PC and don't want to tear it out to bring it over. Just go back into your Settings and "Developer options" and then check the box for "ADB over network."
 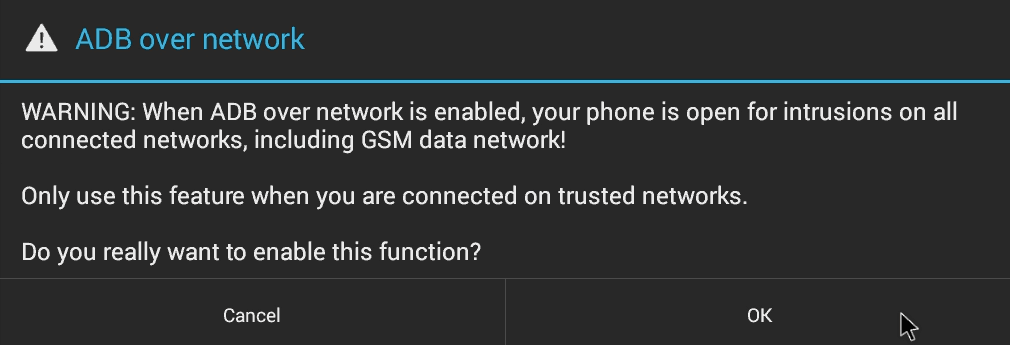 Just like the old Ouya OS its warning you that it's a security risk to open up ADB over the network because if your network is insecure someone can just login and do terrible things to your poor android box. If your network is secure then press OK to continue. If not and you are on a public or college network use the USB cable method instead.
 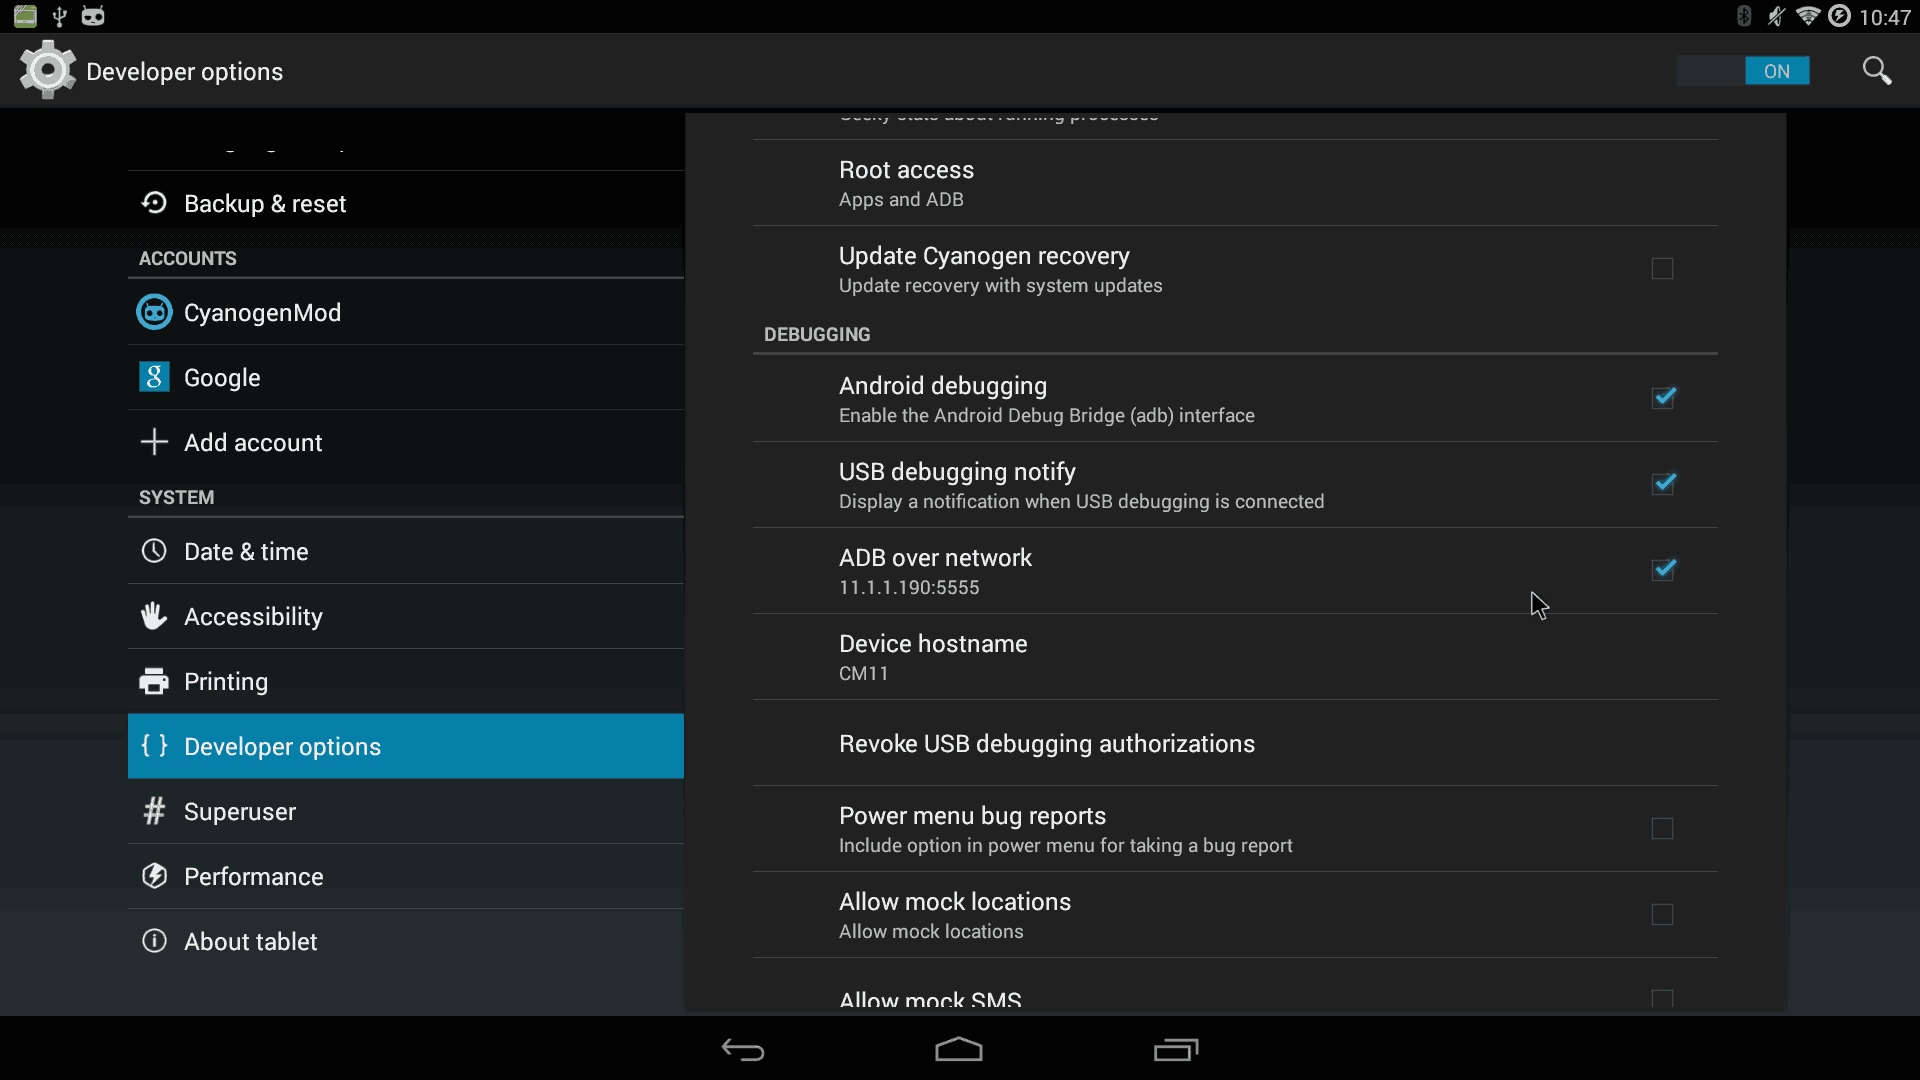 Once complete it will provide an IP address for you to type into your source computer. This will be important for the next step.
Extract Files:
 If you have not done so already extract the script into a folder you can remember (the screenshot above is WinRAR for Windows you can download it here.) In following the Cyanogen on Ouya tutorial I will extract it to the same folder C:\cyanouya and will be used as a reference point throughout this tutorial.
ADB into your Ouya and pass some commands.
Alright! Now we are ready to modify our system to disable HW overlay permanently! Let's begin by opening up a command line and going into the C:\cyanogen folder where the script and where ADB will be located at. and type the following:
cd C:\cyanouya\
adb connect 11.1.1.190
adb push C:\cyanouya\91fixoverlays /sdcard/download/
You do not need the adb connect command if you are using a USB. As long as your OS can still see it in the device manager from the previous tutorial you are good. IP address 11.1.190 is placed as an example IP address and yours will be different. This will push the file into our Ouya. Next:
adb shell
And we begin with the real commands!
su
mount -o rw,remount -t ext4 /dev/block/platform/sdhci-tegra.3/by-name/APP
cat /sdcard/download/91fixoverlays > /etc/init.d/91fixoverlays
chmod 777 /etc/init.d/91fixoverlays
reboot
Let go through the commands I just passed.
- SuperUser is required as we will be modifying system files. If there is a request on your Ouya to grant access be sure and approve yourself.
- The mount command is passed to make the Ouya System partition writable. This is the same command I passed when we were still rooting the Ouya.
- Since we do not have busybox installed to pass typical Linux commands like 'cp' we instead use 'cat' to copy the text file where we need it to be in /etc/init.d/
- Richmond is a very important step as we are telling the Android operating system it's okay to run this as a script. I know it's in poor Linux etiquette to be using 777 which is full access to everyone. However, since it's a low-security device I will not worry about it. Just don't go around chmod 777 everything on a REAL Linux box.:)
- reboot the Ouya to see if the effects have been taken.
 After your Ouya reboots you should be able to go right back into your settings menu and find out that Disable HW overlays are checked. If so, then congratulations! Your script is operating as it should and you no longer have to keep checking that box prior to loading Kodi! The on-screen display will work happily until you reload CyanogenMod or upgrade it.
S, I don't want to fight with the android OS, isn't there another way?
Alternative script avoidance step: Disable Kodi's 3d codecs and revert to software mode to correct the on-screen display.
Yes, you can disable hardware acceleration inside of Kodi which will force all of the videos to run purely off of the CPU. This may be fine if you are running a lot of standard definition video however if you have high definition or high bitrate video you may experience frame dropping since the Ouya Tegra 3 CPU is not powerful enough to handle both the GUI and the video encoding by itself.  Launch Kodi and go to SYSTEM and then Settings.
  Click on the Video tab.
 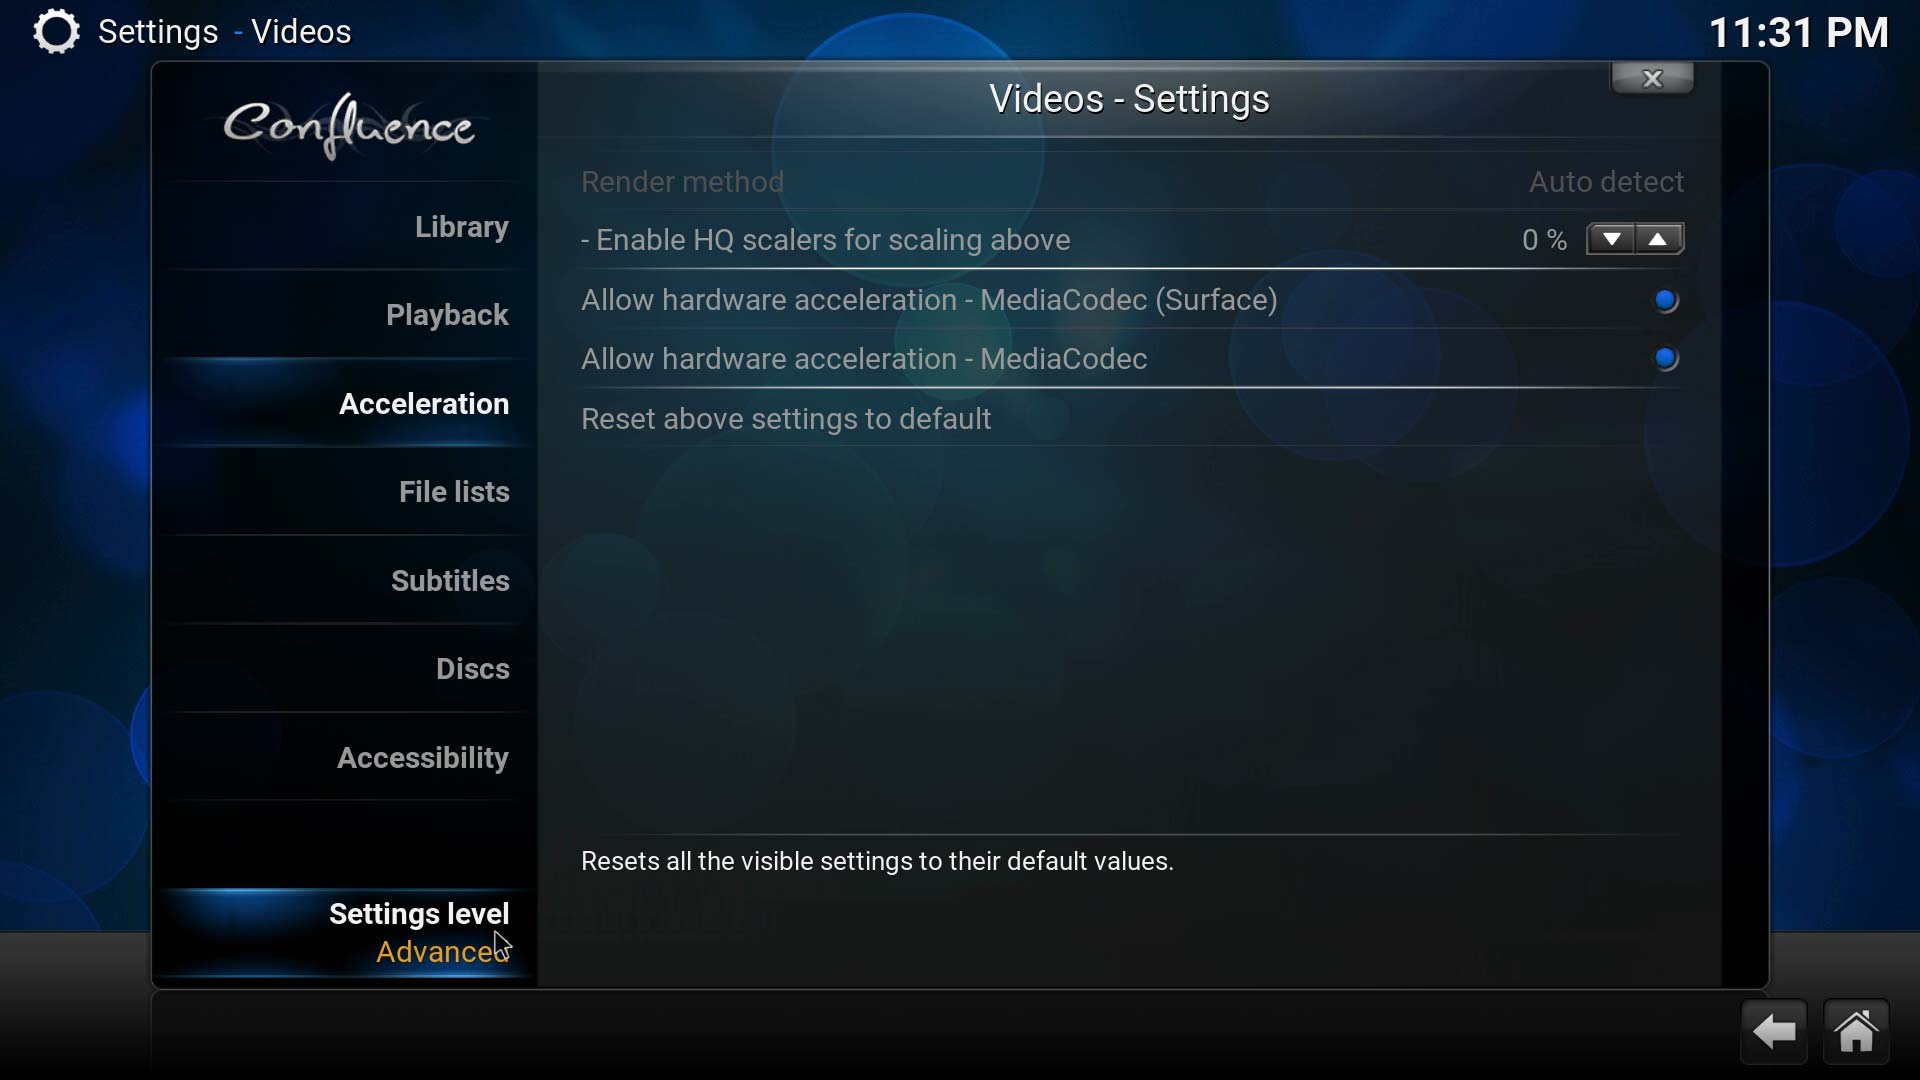 In order for you to actually see the acceleration menu, you will have to click on the settings level in the bottom left corner and set it to advanced. From there you can untick the hardware acceleration of your MediaCodecs (surface) and restart Kodi. On-Screen functionality should return afterward.
Related Blogs:
 CyanogenMod and the Ouya
Final thoughts of disabling hardware overlay and the on-screen display bug.
This is one of those things where I can't really submit a bug report to the Kodi team considering we're running on a hyper-beta CyanogenMOD OS so it's a big question mark if it's really the OS's fault or the Nvidia Tegra's fault that Kodi does not operate well in mixed 3-d/2-d mode. Perhaps in the next version of Kodi V17 code-named "Krypton" they may be able to fix these problems and more! Either way, I'm glad that this problem is not a show-stopper and perhaps we can get a few more years out of my little silver box. Remember, Ouya/Razor can't tell you when your box is dead. That is up to you.
Special thanks and acknowledgments:
Comments like Paulo and Pavlos for bringing this to my attention and testing out the scripts on their Ouya's. Thanks, guys. The XDA forum and all of the beautiful people that help keep the Ouya alive. The Ouya Forum to keep the dream alive.
END OF LINE+++

Hi, I am trying to apply the KodiJarvis-HW-Patch-0.1.zip patch to fix the OSD bug in Kodi Ouya CM11. I am able to temporarily disable HW overlays (as in the instructions), but after rebooting the bug reoccurs.
I can't run the patch because the USB port in the Ouya (silver model) seems to be dead. I tried 3 different mice, a USB keyboard and a 1GB USB stick and in each case the Ouya won't recognize any of them. I managed to get the KodiJarvis-HW-Patch-0.1.zip file into /sdcard using the Ouya game controller. However when I reboot the Ouya into recovery, I have no way of arrowing down in the CWM screen because the USB port seems to be dead. No bluetooth working either in Recovery Mode.
Do you know if the USB port will come back to life if I turned bluetooth OFF? I am reluctant to do this before asking for advice, since the bluetooth game controller is the only way of controlling the Ouya at this moment.
Thanks, (and otherwise the Cyanomod CM11 is working great!).
I had a USB port end up dead on my retail silver edition Ouya that i found out the metal springs that actually press the contacts together wasn't doing nothing. https://www.s-config.com/ouya-support-loose-usb/ - talks about it a little bit. CWM is rather limited on what kind of Inputs you can use due to the fact that it's just a recovery partition which is why bluetooth will not work.
Beyond that, if the fuse is broken providing power via USB you can try a self-powered USB hub to see if that helps..
If all else fails and your USB port is indeed destroyed. You can try the second method of installing the patch which requires either ADB cable or ADB network access. Even though method 2 is a longer way to install it will at least get the patch on without USB intervention..
Go figure! You won't believe it. I left my Ouya unattended for 30 mins and now the USB port works normally again. I got the patch installed and it works great! (I was thinking of the ADB method as a plan "B", just in case.)
I will keep the knowledge about the contacts in the USB socket in mind in case this happens again. It's also good to know that Bluetooth and USB devices can be used at the same time in CWM 11.
Thanks for your help.
Thanks a lot for this guide! I had been trying to fix the missing OSD for some time without success, it works perfectly now.
Thank you so much!
Thanks for writing this to add its own post. Very clear and easy to understand.
One quick question. You ( the xda script) set the system folder to read write, but never set it back to read only. Does the reboot set it back to read only, or do these steps leave system in a read write state?
Thanks again!!!!!!
It's no mistake. When you reboot your Ouya or any android/linux system goes through re-mounting your root and system partitions thus your system partition is no longer read-write. Just read-only save for a few mount points that allow user interaction like /sdcard. If you have to add/remove more system files after reboot you'll need to pass that command again.
Sweet that fixed it! Long live the OUYA!
Thanks!
Beautiful guide again. Was very easy to follow and restore that functionality in Jarvis.
My OUYA thanks you too. She was dead before you helped me breathe new life into her with you incredible guides.
Cheers
"S" did I allready tell you that you are "5 stars"?!?!?!?
Many Many thanks "S"
Kudos to the writer...
Well done sir S,well done... :bow:
P.S crossing fingers for CM 12...there are a lot of Ouyas out there...